Pages

Monday, May 31, 2021

May Stash Report and Goals Update

May turned out to be a busy month. I was asked to come up with a project that the PCQ charity committee could make for their Quilts for Kids themed month. I came up with Strippy HSTs, and spent a lot of time prepping for the sew day. Here's a tutorial for the Strippy HST block if you're interested. 

For class samples I used my own fabrics but for the group's kits we used the club's stash. A local quilter was having an estate sale and I picked up 10 FQs of kid-friendly prints for $1 each. I used half of each in my class samples and donated the other half to the club. I also donated some of my own kid-friendly fabrics to the club, in the form of squares cut for the kits. 


May Stash Report

IN this month: 10-1/2 yards (Quilter's estate sale. 2-1/2 yds FQs. 8 yards wide backings from online order for Star Spangled Spiral)
OUT this month: 8-1/4 yards (Donated to PCQ kids' quilts project plus demo step-outs: 3-1/4 yards (includes the FQs from the estate sale).  2 sample Strippy HSTs tops, 5 yards.)

IN YTD: 41-7/8 yards
OUT YTD: 43-3/4 yards
YTD Net Change: 1-7/8 yards out

Goals Update 

May recap: 
1. Prep for Work Day and Sew Day w/PCQ charity committee: finish cutting squares, write pattern, make step outs and demo sample top. YES, it took two work days to make the kits and because of an error I ended up making two demo tops. 
2. Lead/teach project at PCQ work day and sew day. Yes, I enjoyed it and it seemed like the others did too. 
3. Bind and label Color Spoke Challenge. Progress; the binding and label are sewn on but the binding is not stitched down. 
4. Continue binding WIGSP. Slight progress; I'm 1/4 of the way around hand sewing the binding down.
5. Send off Rainbow Charm H2H quilt. No, not sent yet; I have another quilt in work to go to the same destination and I'll send them together in June. 
6. Make backing & binding for PCQ demo quilt, deliver for quilting. Done, I made backings for both demo tops.  In addition, after they were quilted I bound them. Both quilts are completely finished. 

Other:

1. Cut strips and started piecing blocks for a coral version of Strippy HSTs to go to Hands2Help along with Rainbow Charm. 
2. Ordered fabric and started cutting pieces to remake Star Spangled Spiral.


June Goals: 
1. Finish coral Strippy HST quilt for Hands2Help and get both H2H quilts sent off. 
2. Plan and prep a project to work on at Weds. morning and Mon. evening social sewing days with the PCQ club. 
3. Finish the binding on Color Spoke Challenge.
4. Start sewing blocks for Star Spangled Spiral (kit them up to work on at social sewing days/evenings with thePC girls). 
5. Make progress on the binding on How Many (WIGSP).
6. Plan and prep projects for retreat in July.
7. Make placemats for FMQ practice
8. Do muscle memory "homework" assigned by Linda L

That's a lot and it will be a busy month. But there's a lot of overlap there because some of the tasks can be done at the social sewing events, and the placemats and muscle memory homework are part of prep for retreat in July. 

Social Sewing: Covid restrictions have loosened up in PebbleCreek and we can use the sewing room at the Creative Arts Building for extended hours now, with more people allowed in the room. One group meets informally on Wednesday mornings, then goes out to lunch, and I've been invited to join them. Another group of year-rounders (the snowbirds are gone now) is being organized to meet on Monday evenings for socializing and sewing. Everyone in PebbleCreek is so friendly and welcoming! 

Retreat: Neighbor Linda L invited me to participate in a retreat in July with several of the other more experienced PC quilters.  She's a master quilter and she's pushing me out of my FMQ comfort zone. She's well known in the community as a great teacher, and she's a lovely person, so I'll gladly do the homework and prep work and look forward to next month's retreat. 

Remakes: Over the next few months I'm going to remake Star Spangled Spiral and Log Cabin Triangles (tops only) in preparation for giving a trunk show in December. The club has booked me for their December program, with the possibility of teaching a Cut and Shuffle Quilts workshop afterward if there's interest. 


Star Spangled Spiral

Log Cabin Triangles

All these projects and social sewing opportunities ought to keep me pretty busy for awhile! 


Link ups: Small Quilts and Doll Quilts, Love Laugh Quilt


Sunday, May 30, 2021

2021 H2H Final Check in

Sarah over at Confessions of a Fabric Addict, who runs the Hands2Help charity quilt drive every year, has asked for final updates from all participants. At the check in in early May, I posted these: 

Rainbow Charm, for Happy Chemo (it will go directly to the breast cancer foundation that Happy Chemo sent my 2020 H2H quilt to, to save on postage costs). 


Eagle panel and Railroad panel, Boy Quilts going to local social services agency via PebbleCreek Quilters.


Wild animal chevron, going to local social services agency as a Quilt for Kids

Since the May check in, I've finished these: Strippy HSTs, teaching samples for PCQuilters charity sew day, two Quilts for Kids going to the local social services agency.

I have another quilt in work that I want to send to the Happy Chemo breast cancer foundation as well, but it isn't finished yet. I plan to get it finished and sent out in June. No photos yet, but the block is the same as the Strippy HSTs in cheerful colors of coral and pink. 

Thanks, Sarah, for all your hard work to organize and host Hands2Help!


Friday, May 28, 2021

Fraternal Twins

One of the PCQ members who is already certified on the long arm quilted my Strippy HST tops when she was doing some charity quilting. She used an allover meander, perfect for these. Whoo-hoo, they're now finished quilts. 


The one on the right is the original class sample, with the blocks made correctly with the strips going in the right direction. The one on the left is the one where half the blocks have the strips going in the wrong direction. Can you tell? Maybe if you search.... Does it matter? Not at all. 

These are quilts for kids. They're going to the local family services agency. These two have mostly prints that will appeal to an older boy, but there are other quilts being made by others in the club that have gender-neutral or more juvenile or more girly prints. Most of the fabrics in these two samples were mine but the rest of the quilts made by the others use fabrics from the club's stash. The backings for these also came from the club's stash. 

I still need to put the club's label on the backs. I'll do that, but then think I'll hold on to them until the club meets live in June and the chair of the Community Services Committee can show them for Show and Tell.  (Imagine - a live guild meeting!!! )

If you or your charitable group would like to make donation quilts using my Strippy HST blocks, you can find the tutorial here

So, I have not one but two donation quilts for kids. Maybe they'll go to twin boys. But like the boys, each quilt is unique; the boys will be able to tell them apart so each gets his very own. 


Link ups: Confessions of a Fabric Addict, Alycia Quilts

Monday, May 24, 2021

A Very Forgiving Pattern

Full disclosure: I screwed up when I was making the sample for my Strippy HSTs for the PC quilters. Not only did I not follow my own pattern, I made the same mistake for half-a-quilt's-worth of blocks before I discovered the error. Which was unfixable at that point. 

Here's what the block is supposed to look like. Note that the strips run perpendicular to the diagonal  HST seam. 

When making the blocks the HST seam should be oriented like this, going perpendicular to the strippy seams. See tutorial here for the block.


I made blocks with the strip seams going the wrong direction. The HST seam ran parallel with the strip seams. The blocks came out like this, with the strip seams parallel to the diagonal HST seam. 

I didn't discover the error until I had already cut apart the HSTs to make two blocks. But it wasn't just those two blocks.  I had started making a batch of 24 blocks and didn't discover the error until I had cut them all. So I had 24 blocks, all made with the strips going the wrong direction, and all cut so I couldn't fix them. 

I decided this wouldn't be a problem, it would be a design decision. After all, this is a quilt for a kid. He's not going to know or care what direction the seams in the block go. So I used all my "bad" blocks anyway. Let's not call them bad blocks; we'll just call them B blocks.

I ended up making another set of regular blocks so I had enough correct ones for the teaching sample, shown here: 

But since I had half-a-quilt's-worth of B blocks, rather than let them go to waste I made another batch of regular blocks and mixed them in the same quilt. It turned out fine. Here are both regular (top row) and B blocks (bottom row):

It truly doesn't matter what direction the strip seams go. What's important is the light-dark contrast of the HSTs. Here's the second top, made with half B blocks and half regular blocks:

With these blocks, any layout that works with Log Cabin blocks or with HSTs is fine. This chevron layout is just one possibility among many. 

Now that both the class sample top and the B-Blocks top are done, both using the same fabrics, these two tops are like fraternal twins. Someone from the PCQ club will long arm quilt them for charity. Then I'll bind them and turn them in so they can be delivered. 

I told the girls when I was teaching the block that it was very forgiving. A couple of people accidentally made B blocks and I told them their blocks and their quilts would be fine, no problem. For donation quilts, no one is going to care which way the strip seams go. Both of my tops are perfectly acceptable, B blocks and all. As I said, very forgiving. 


Friday, May 21, 2021

Finished Quilts for Covered in Love from Kat

Recently Kat from Kat and Cat Quilts posted photos of two finished quilts for Covered in Love. I had sent her the tops last year when I knew I wouldn't be able to finish them but I still wanted them to go to a good cause. They're both large throws, in the 60 x 75" range.

The first is a Plus quilt. I like Plus quilts for donation quilts because they're fun to make and they have an uplifting, positive vibe. I especially enjoy curating the palette and laying out the design. This one was inspired by the colors in one of the prints, and when I raided my stash for more fabrics to go with it, I found the last of my Paddington Bear yardage. I sent binding, so he even makes an appearance there, too. This is Kat's photo that she posted of the finished quilt. 


The other one is this Basket Weave that was a Sew Bee It project. The girls in the bee made the blocks for me. I provided the two outer strips and the center strip for each block, and they chose fabrics that harmonized. The variety of prints is wonderful, and the palette could be masculine or autumnal. Kat's photo is wonderful, too. She captured that rich olive true to color, something I have not been able to achieve. 

I'm so glad these tops are now finished quilts and they're going to families supported by Covered in Love. Thank you, Kat.


Link Up: Confessions of a Fabric Addict, Alycia Quilts

Monday, May 17, 2021

PCQ Community Sew Day

I had the pleasure of working with the girls who participated in Saturday's PCQ Community Sew Day. The theme this time was Quilts for Kids, and the quilts will go to the local family services agency. 

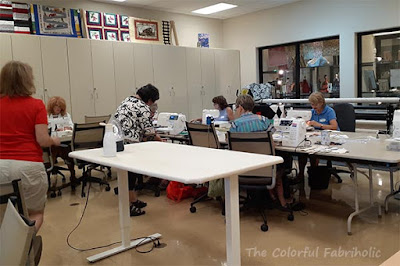
Due to Covid restrictions we were limited to 12 people in the sewing room, but we had a full house and it worked out quilt nicely. 

The committee had already prepped kits, so everyone had a kit with enough pieces to make a 45 x 60" top with 48 blocks. This is the Strippy HST block: 


I posted step-outs and samples so everyone could see what we were working on. If you'd like a tutorial for this project, scroll down or  click here. This block is very forgiving - no precise matching. The strips will definitely come out a bit wonky, but it totally doesn't matter when the blocks are squared up. 


PebbleCreek rules meant the Creative Arts building closed at noon, so we only had three hours to work. But it was enough time for everyone to get comfortable making the block. 


It was a fun morning for me, and everyone there seemed to enjoy it. Everyone took their unfinished kits home to work on, so I'm sure sooner or later we'll be seeing Strippy HSTs showing up in Show & Tell, and in finished quilts for kids. 

If your group would like to make Strippy HSTs together as a group, I recommend making kits by doing all of the cutting ahead of time. The committee spent a couple of 3-hour work sessions prepping a dozen kits. We used my 2" strip die cutter and kid-friendly fabric from the club's donated stash. Contact me for more info for your group if interested. 


Monday, May 10, 2021

Strippy HST Tutorial

As promised, here's the tutorial for the Strippy HST blocks the PCQ charity committee is using for kids' quilts. 

For a quilt finishing at 45 x 60" you'll need 48 blocks. This is the sample I made for teaching, but there are many possible layouts. Any layout that works with HSTs or Log Cabin blocks will work. 


HSTs (half square triangles) work best if there is strong value contrast. If the featured prints read dark, the scrappy strips should read light, and vice-versa. All the feature prints for one quilt should read either dark or light, not mixed. In my sample, all the feature prints are dark. 

Blocks are made in pairs, so you'll need 24 sets of block parts. 

Make two matching blocks at a time. Blocks finish at 7-1/2” (8” unfinished). For each pair of blocks:

1. Cut 1 (one) 8-1/2” square of a feature print. Press a crease on the diagonal, wrong side in.


2. Cut 2” random strips of assorted fabrics. For two blocks cut 1 (one) strip 13-1/2” long. Cut 2 (two) strips 11-1/2” long. Cut 2 (two) strips 8-1/2” long.

3. Cut (one) 4” square and cut in half on the diagonal. Option: use a charm square cut on the diagonal. No need to trim it down to 4” first.


4. Piece strips to make a square larger than 8-1/2”:

o   Fold each strip in half crossways and crease in the center to create match points.

o   Matching centers, sew an 11-1/2” strip on each side of the 13-1/2” strip.

o   Sew an 8-1/2” strip on each side of the 11-1/2” strips.

o   Crease the center of the long side of each 4” HST and sew one to each side of the 8-1/2” strips.

o   Press.

5. Layer a print square and a strip pieced unit right sides together, making sure the crease in the print square is perpendicular to the strips.  


6. Sew a scant ¼” on each side of the diagonal crease. 

7. Cut apart on the crease, press, and square up each HST to 8” to make two blocks.


Because the strip pieced unit is an irregular shape, chances of the HST coming out with the strips perfectly centered and symmetrical are slim. The HST block will likely come out wonky, which is fine. 


When making multiple blocks, the yield is as follows:

For 8-1/2” feature print squares:

   - From 8-1/2” WOF strip, 4 squares (possibly 5)

      -From fat quarter, 4 squares

For 2” strips:
            - From one WOF strip:  yield 3 (three) 13-1/2” strips  -OR-  2 (two) 11-1/2” strips and 2 (two) 8-1/2” strips

 -From one half-WOF strip such as from a fat quarter:
1 (one) 11-1/2” strip and 1 (one) 8-1/2” strip


For my sample quilt I used 24 feature prints. Fewer feature prints would also work. The more different prints used, the scrappier the end result is. 

Use a very large variety of fabrics for the 2" strips and side triangles. The more the better! This is a good way to use up scraps, leftover binding, and narrow backing offcuts. 

I hope you enjoy making these blocks and this quilt. If you post your version to social media, please credit https://thecolorfulfabriholic.blogspot.com/2021/05/strippy-hst-tutorial.html

Edited to add: If you would like a PDF of this tutorial to use for charity or donation quilts, please leave a comment. Be sure to include your email address. 


Link ups: Small Quilts and Doll Quilts, Love Laugh Quilt, Quilt Fabrication


Sunday, May 9, 2021

H2H Check In

Oops, almost forgot, today is check in day for Hands2Help over at Confessions of a Fabric Addict

I finished a quilt for H2H about a month ago. It's for Happy Chemo. This is Rainbow Charm; more of this quilt's story here.


Although not included among the Hands2Help charities, I have been making donation quilts for a local family services agency supported by the PebbleCreek Quilters. In February we made quilts for boys; these are the two I pieced from their kits and bound. Someone from the club quilted them. 


And two I made entirely: 


I'm sure Sarah will understand about me supporting a local organization in addition to one of the designated H2H charities. It's all good, right? 

Mothers Day

To all the moms, grandmas, and mother figures out there, happy Mothers Day!

Mine has been particularly interesting. Doesn't everyone need one of these? 


It's a saguaro skeleton. The short side is 5 feet tall, the tall side is over 6 feet. We found it at a pottery store yesterday, fell in love with it, and couldn't resist. The original plan was to put it in the foyer as a sculptural piece, but we like it in the yard. If birds try to nest in it we may bring it onto the covered patio, or into the house.

We have desert landscaping in our back yard but it needs some help. We're working on plans, and we'll have some plants added in the fall. This is the wrong time of year to plant, we're told; October is better. That bush in the back corner will probably be replaced with an ocotillo. The mound that the cluster barrel cactus and the pots are on will be resculpted a bit and the saguaro will be in the gravel, not on the grass. 

That tree with the limbs that go in all directions is a palo verde. The yellow under it is fallen flowers - it was covered with flowers. You can still see a few of them in the branches. The flowers were so dense last week that just walking out onto the patio (from where the photo was taken) we could hear the bees buzzing. 

Yes, we're definitely enjoying Arizona. 

Friday, May 7, 2021

Strippy HST Sample for PCQ

In my previous post (scroll down) I mentioned making kids' quilts for PCQ, and the Strippy HST block I came up with for them. 

Yesterday we had a work day to cut strips from the club's stash and package up kits. Even using my big die cutter with the 2" strip die we didn't get enough done, so we'll have another work day next week to finish getting the kits together. Due to summer hours at the Creative Arts building our work day was cut short. 

In addition to the block step-outs shown in my earlier post, I made a sample top to show the girls what we'd be making. This is just one of many possible layouts. 


Since I had my choice of the fabrics and scraps used in this quilt, I used a lot of my own sports prints, and donated the leftovers from the FQs to the cause. I also used several reclaimed plaid shirts. Some of the light strips came from the club's stash, but most came from mine, including my scrap drawers. A great way to use up scraps! There are a lot of I-Spy type prints here, everything from basketballs, bicycles and boomerangs to parachutes, pirates and puppies. Some boy in need of a quilty hug will eventually get this. 

I'll post a tutorial for this project next week. 


Link ups: Confessions of a Fabric Addict, Alycia Quilts

Wednesday, May 5, 2021

Strippy HSTs for PCQ

When I went to my first PCQ Sew Day, I met Patsy, the chair of the charity committee. I didn't realize at the time, and sign-ups to participate were open to all club members, but mostly the Sew Days have been for the charity committee members due to social distancing during Covid. Patsy and I kind of hit it off. Turns out there was an opening on the charity committee and she invited me to join. 

Each month the committee does a project to benefit one of our charities. The local family services agency is one of them, as is a local hospice. So far since I've been here we've made boy-themed quilts per the agency's request, fidget mats for the hospice, and jelly roll race tops. The finished jelly roll quilts will go to families transitioning out of homelessness, or if suitable to kids going into foster care. 

The theme for May is Kids' quilts. Patsy asked me to suggest a pattern that would work with the resources they have both in terms of supplies and time. The quilting room at the PC Creative Arts Center has many bins overflowing with fabric that's been donated, all sorted by substrate and color. In terms of time, the person in charge of the month's project does advance prep, then the whole group has a half-day Work Day to make up kits for the Sew Day. During the winter the Sew Days are full days, but PebbleCreek has started summer hours now, so instead of a full day Sew Day we'll have only a half day. Each month, everyone takes home their partially finished top and finishes it at home. 

The project I came up with is Strippy HSTs. I can do some advance cutting. We can use my Accuquilt Studio cutter and cut 2" strips on the Work Day, which is tomorrow, and package up kits. Then on our Sew Day we can make blocks and the girls can finish setting them together at home. 

The Strippy HST block looks like this: 


Patsy and I pulled all the kid-friendly prints from the club's stash and I cut them into large squares, enough for 12 kits. I added some from my own stash; these are FQ finds from my recent shop hop.

Some of the prints are dark like these, and some are light. Since HSTs work best with value contrast, we'll cut light and dark strips and package the kits accordingly. 

Here are photos from my test blocks. I'll post an actual tutorial with measurements later. 


Large square folded in half and pressed. This example is a light square which will have dark strips.


Strips, which when sewn together will make a unit larger than the focus print square.


Then I'll sew on each side of the pressed fold, cut, and square up to make two HSTs. 

This is as for as I got with photos - I was on a roll making blocks and forgot to take more process pics. 

Each kit will have 24 large squares of kid prints and enough strips and triangles to make 24 pieced units, which will result in 48 blocks which will result in a 45" by 60" top. 

As I said, I'll post an actual tutorial later, with dimensions for the square, strips, and small triangles. This method creates wonky blocks, no precise matching. 

Tomorrow is our Work Day, so I hope to take some more pics and post more about it later. Meanwhile, I have a sample top to finish so I need to get to work. 


Monday, May 3, 2021

April Stash Report and Goals Update

 April turned out to be a surprisingly busy month in the sewing room. And a great opportunity for stash enhancement when I shopped for a baby quilt project and shop-hopped with new friends. May looks a little less busy but more involved with the PC quilting club. 

April Stash Report 

IN this month: 13-3/8 yards (10-7/8 yards for Deco baby quilt (top & backing plus extra).  2-1/2 yards misc. from shop hop.)
OUT this month: 6-1/4 yards (Deco baby quilt: 3-1/4 yards for top & binding, 2-1/2 yards backing. Animal/chevron quilt binding, 1/2 yard.)

IN YTD: 31-3/8 yards
OUT YTD: 35-1/2 yards
YTD Net Change: 4-1/8 yards out

Still in the black for the year but closing the gap; my goal is to break even but refreshing the stash with more usable fabrics is certainly going to happen along the way. 


Goals Update

April Recap: 
1. Finish Animal Print & Chevron quilt for PCQ. Done
2. Make baby quilt for niece's baby girl, due in May. Done. 
3. Start quilting Color Spoke Challenge from STLMQG 2019 BOM so I can enter it in their show in July. Done - Quilting completed, ready for binding. I was on a roll and just continued quilting until it was done. 
4. Bind How Many (WIGSP): Started, binding attached and hand sewn down 1/8 of the way around. 

Other: Per request of the chair of the PCQ charity committee, we discussed plans for the sew day for  kids' quilts in May and I came up with a design. I started planning step outs to teach during the work day and sew day, and cut pieces in preparation for making kits on the work day. 


May Goals: 
1. Prep for Work Day and Sew Day w/PCQ charity committee: finish cutting squares, write pattern, make step outs and demo sample top.
2. Lead/teach project at PCQ work day and sew day.
3. Bind and label Color Spoke Challenge.
4. Continue binding WIGSP.
5. Send off Rainbow Charm H2H quilt.
6. Make backing & binding for PCQ demo quilt, deliver for quilting.


It doesn't seem like a very busy list, but we're hoping to go on a couple of short trips in May so my time will be spent on other, non-quilty, things. Oh, and Gary wants me to make him a shop apron to wear at Wood Carving. He hasn't found anything at all locally and nothing he likes on any website he's looked at so far, so we bought denim and I'll make him a custom apron. 

I'll post more about the project for PCQ in future posts, when I'm far enough along to have good pics, and I'll post a tutorial. I'm calling the project Fast and Wonky Strippy HSTs. 

Link ups: Small Quilts and Doll Quilts, Love Laugh Quilt