September results:
1. Complete applique on Dresden project. Only 40% complete
2. Layer, quilt, and bind jelly roll project. DONE.
3. Edit pattern for jelly roll project; finalize for publishing. Not done.
4. Write & post tutorial for hidden zipper pillow to blog (requires reconfiguring tutorial tab). Posted but still need to re-post charmed snowball tutorial and reconfigure tutorial tab.
5. Keep up with bee blocks. QF 1st Saturday - Done. Sew Bee It - no block was handed out in Sept. Piecing Group - one of two busy blocks done. Will do the other in October since Oct. is a catch-up month.
So, not a very good track record for September. In my defense, I was gone for 15 days and had some other stuff to do when I returned. I did slightly better on my unpublished goals, but certainly did not achieve them all.
October Goals: well, obviously some will have to carry over from September....
1. Complete applique on Dresden project.
2. Complete table runner & placemats.
3. Edit pattern for jelly roll project, now called LINKED; finalize for publishing.
4. Reconfigure tutorial tab, repost Charmed Snowballs tutorial, & post hidden zipper tutorial.
5. Keep up with bee blocks.
6. Participate in pillow project sew-in if held in October
Other quilty things on tap for this month are related to The Quintessential Quilt 2013 Show being held at the library in U-City. QQ2013 is the St. Louis region's premiere juried and judged quilt show; it hangs for most of October, and it's free. On Thursday the 3rd I'm helping to hang the show during the daytime; on Sunday the opening lecture and reception take place; and on Tuesday the 15th another program will be held at the library. If you're in the St. Louis area, please come visit.
Linking up with Judy at Patchwork Times; thank you Judy for keeping us accountable to our goals!

Tuesday, October 1, 2013
Monday, September 30, 2013
Design Wall Monday 9/30/2013: Table runner
I'm still working on my hand applique on the Dresden rows, but you've seen that project before so I'll refrain from showing it again until the top is finished. It's slow going.
But - Finally I'm back in the sewing room! I need a table runner and placemats for the kitchen table. The wood is too pretty to hide under a tablecloth all the time, but it needs to be protected from spills & scratches. So, I think I'll make a table runner and at least two placemats.
I had heard somewhere that you can use The Binding Tool by TQM products to make a French Braid.

So, I pulled some fabrics that go with my kitchen and cut a 2-1/2" WOF strip or two of each, and cut the shapes using the binding tool. I started with a square in the center and discovered it should be oblong; I'll fix it when I'm ready to sew.
Here's my design wall with pieces laid out:

But - Finally I'm back in the sewing room! I need a table runner and placemats for the kitchen table. The wood is too pretty to hide under a tablecloth all the time, but it needs to be protected from spills & scratches. So, I think I'll make a table runner and at least two placemats.
I had heard somewhere that you can use The Binding Tool by TQM products to make a French Braid.

The Binding Tool
by TQM Products
So, I pulled some fabrics that go with my kitchen and cut a 2-1/2" WOF strip or two of each, and cut the shapes using the binding tool. I started with a square in the center and discovered it should be oblong; I'll fix it when I'm ready to sew.
Here's my design wall with pieces laid out:

Runner & placemat layout
I think I'll do this as a quilt-as-you-go project, using the sew-and-flip method. That means I have to find backing and batting and prep them. Once the French Braid units are all sewn down, I'll add end triangles to square it off and side strips to make it the right width. I'm not sure yet what the finished dimensions will be, but when I post the finish, I'll give the dimensions & number of pieces. On the wall here it's about 6 feet long by one foot wide, but that's before the seam allowances consume some of it.
Cutting these binding tool shapes from WOF strips yielded five pieces per strip (plus one 2-1/2" square). There are enough cut pieces that are not on the wall for at least another placemat, plus probably a few extra.
Then I think I'll use the extra squares to make some 9-patch potholders. The potholders I have are from 10 years ago when we remodeled the kitchen, and they've certainly seen better days. Past due for replacements!
Linking up with Judy at Patchwork Times for Design Wall Monday - check out all the creative inspiration over there.
Sunday, September 29, 2013
Stash Report for September; Losing and gaining friends
September Stash Report:
September In: 5.5 yards
September Out: 2.0 yards that I can count. (More was cut for projects that are not far enough along to count yet.)
YTD In: 102.5 yards
YTD Out: 94.8 yards
YTD Net Change: 7.7 yards in
Today I'm thinking about friends.
One passed away last week after battling brain cancer and the side effects of treatment. She was creative, talented, generous, and a perfectionist. Her quilts won awards at CSQ challenges and The Quintessential Quilt shows, and were exhibited at the Paducah AQS Show. She was very generous in sharing her techniques and expertise with us. She was well organized and helpful; she quietly did whatever needed doing. She used to produce the newsletter for CSQ; she set the bar high. I took over the newsletter when she became ill. I told her a couple months later that she unknowingly gave me a great gift: producing the newsletter has pushed me to grow and develop in ways I hadn't expected. Another friend and I are going to the visitation later today and the memorial service tomorrow; other friends will be there, too. I will miss her.
Yesterday a relatively new bee I belong to got together to sew pillows for a charity project. We hadn't gelled as a group yet because of being rushed for time at guild meetings, etc. We took time out from sewing to get to know each other better and I enjoyed the conversation. Some in the group put into words what I had been feeling: we just go to the guild meeting, sit & listen, but no one talks to each other except those cliques that already know each other. I thought it was just me, my natural shyness. I'm glad others felt the same way and that now our bee is planning to meet for lunch after the guild meetings and spend more time together. Plus we have another pillow-sewing event planned. I'm looking forward to growing friendships within this group.
Linking up with Sunday Stash Report at Patchwork Times. Check out how other quilters are managing their fabric collections there.
Friday, September 27, 2013
Friday Finish 9/27/13: first Saturday blocks
Sometimes you have to count the little finishes, right?
No big quilty projects completed this week, but it was good to get back in the sewing room after vacation and cleaning up from vacation....
However, I did get my September blocks done for my LQS's First Saturday project. This year's theme is the Greek Isles and the fabrics are all batiks, yummy!


.jpg)

No big quilty projects completed this week, but it was good to get back in the sewing room after vacation and cleaning up from vacation....
However, I did get my September blocks done for my LQS's First Saturday project. This year's theme is the Greek Isles and the fabrics are all batiks, yummy!

September main block

September alternate block
DH had a finish last week that's Whoop Whoop worthy: he took a glass blowing lesson at The Hot Shop in Orange Beach, AL, and made this ornament. Pretty cool, huh!
.jpg)
Glass blowing lesson

Finished ornament
Linking up with Finish it up Friday over at Crazy Mom Quilts and Can I Get A Whoop Whoop over at Confessions of a Fabric Addict. Check out everyone else's finishes over there!
Thursday, September 26, 2013
Gulf coast critters
More vacation pics today -
The most special - and unplanned - event of our recent vacation to Perdido Key was the turtles. Endangered loggerhead sea turtles nest on this stretch of the Gulf coast.
A nest about a mile up the beach from where we stayed was dated 7/14. Gestation is about 60 days.

With all the rain the Gulf coast had this summer, the sand was packed too densely for the baby turtles to be able to dig themselves out of the nest, so the Florida state park biologist and turtle volunteers were watching the local nests and helping the babies out when the time came.

When the biologist brushed the sand away from the nest and opened it, the turtles came out quickly and made their way down the trench to the water. They moved amazingly fast. They're tiny, shells about 2" in diameter. Flash photography was prohibited because the light would blind them. By instinct they go toward the brightest light, which should be the moonlit waves, but man-made light on buildings etc. confuses them.
71 babies made it from the nest to the water. Two more babies were too immature so the biologist took them to allow them to mature for a couple more days. One egg was cracked open but the turtle wasn't out of it yet; she took that too but she didn't know if it would actually hatch. You can see the two babies and the egg in the bucket here. Only about one of every 1000 hatchlings lives to adulthood. I hope one of "our" babies makes it.
.jpg)
By the way, that heron and his friends got breakfast. Fishermen on the beach throw unwanted catch to the herons and they eat well.

We also visited an alligator farm in Foley AL while we were down there. They provide a refuge for nuisance alligators. They also raise alligators, but not for meat or hides, just for the tourists. They currently have 200 adults and they can eventually accommodate 600. They also have a lot of juveniles, ranging from this year's hatchlings to 5-6 footers almost ready for release into the swamp.


The most special - and unplanned - event of our recent vacation to Perdido Key was the turtles. Endangered loggerhead sea turtles nest on this stretch of the Gulf coast.
A nest about a mile up the beach from where we stayed was dated 7/14. Gestation is about 60 days.

Heron at sea turtle nest
Every day we would walk up to the nest to see if they'd hatched yet. The day we took this photo, we ran into the park ranger, who told us the baby turtles would be released that night and we could watch. With all the rain the Gulf coast had this summer, the sand was packed too densely for the baby turtles to be able to dig themselves out of the nest, so the Florida state park biologist and turtle volunteers were watching the local nests and helping the babies out when the time came.

Listening to baby turtles
The babies hatch out of the eggs but stay in the nest for 2-3 days while their shells and flippers mature enough for them to come out. You can actually hear them moving around in the nest. That's DH in the orange shirt, listening. That heron could hear them, too, or feel vibrations under his feet. The volunteers dug a trench through the sand to the water to guide the babies on their run to the sea. When the biologist brushed the sand away from the nest and opened it, the turtles came out quickly and made their way down the trench to the water. They moved amazingly fast. They're tiny, shells about 2" in diameter. Flash photography was prohibited because the light would blind them. By instinct they go toward the brightest light, which should be the moonlit waves, but man-made light on buildings etc. confuses them.
71 babies made it from the nest to the water. Two more babies were too immature so the biologist took them to allow them to mature for a couple more days. One egg was cracked open but the turtle wasn't out of it yet; she took that too but she didn't know if it would actually hatch. You can see the two babies and the egg in the bucket here. Only about one of every 1000 hatchlings lives to adulthood. I hope one of "our" babies makes it.
.jpg)
Immature baby turtles & egg
Seeing the baby turtles hatch and make it to the sea was one of those once-in-a lifetime experiences that we were fortunate to enjoy. We just happened to be in the right place at the right time. My soul is richer for this experience; as Bob Seger sings, "Those are the memories that make me a wealthy soul."By the way, that heron and his friends got breakfast. Fishermen on the beach throw unwanted catch to the herons and they eat well.

Heron with fish
We also visited an alligator farm in Foley AL while we were down there. They provide a refuge for nuisance alligators. They also raise alligators, but not for meat or hides, just for the tourists. They currently have 200 adults and they can eventually accommodate 600. They also have a lot of juveniles, ranging from this year's hatchlings to 5-6 footers almost ready for release into the swamp.

me with little gator

gator in the swamp

feeding time
All in all it was a great trip. Since we had two weeks this year we got to see and do more than we usually do with only one week, and we still had plenty of time on the beach and lots of opportunities to eat seafood. Can't wait to go back!

Linking up with Really Random Thursday over at Live a Colorful Life.
Wednesday, September 25, 2013
Tutorial: 24" Modern Medallion Pillow
Thanks to some helpful bloggers, I now know how to fix my tutorial tab so multiple projects can be shown, with links to each. Over the next few days I hope to have the changes in place.
This tutorial is for a Modern Medallion Pillow which has a hidden zipper, and I'll also post the tutorial for the zipper separately for easy reference.
This tutorial is copyright 2013 by The Colorful Fabriholic, for personal use only. Please do not pin without attribution.

Block Construction: Use 1/4" seams.

All blocks A & B:


Pillow Back:


Finishing:


This tutorial is for a Modern Medallion Pillow which has a hidden zipper, and I'll also post the tutorial for the zipper separately for easy reference.
This tutorial is copyright 2013 by The Colorful Fabriholic, for personal use only. Please do not pin without attribution.

Modern Medallion Pillow
Finished Size: approximately 23 inches square; uses a 24" pillow form.
Block size: 4" finished
Materials:
- Background Fabric, 5/8 yard
- Featured print and pillow back, 3/4 yard
- Fusible interfacing: If 24" wide, need 3/4 yard. If narrower, need one yard.
- 20-22" invisible zipper
- Batting, 27" square
- Lining, 26" square (muslin, etc.)
- From featured print:
- First cut one 24-1/2" square for pillow back.
- Cut 8 4-1/2" squares
- Cut 16 3-3/8" squares
- From background fabric:
- Cut 28 4-1/2" squares
- Cut 8 3-3/8" squares
Block Construction: Use 1/4" seams.

Blocks A & B
All blocks A & B:
- On the wrong side of the 3-3/8" squares, draw a diagonal line from corner to corner. You will stitch on this line and cut the unneeded part away. (If you want bonus HSTs from the cut away part, mark another line 1/2" away from the first.)
- Lay printed patches on solid squares, and solid patches on print, right sides together. Stitch on the diagonal from corner to corner. Chain piece all blocks.

Sewn Blocks
- Cut between the lines of stitching (or 1/4" outside the seam if not making bonus HSTs). Use the bonus HSTs for another project.
- Pressing seam allowances: This is important so your seams will nest together during assembly and yield nice points and well-matched seams.
- Block A: Press seam allowances toward the print patch on 9 (nine) blocks and toward the background for the remainder of the blocks.
- Block B: Press half the blocks toward the print and half toward the ground.

Finished Blocks
- Plain blocks: you should have 12 plain 4-1/2" squares of background fabric.
- Lay the blocks out as shown, starting in the center. Note the direction of seam allowances as shown by the arrows.

Layout showing direction of seam allowances
- Join blocks into rows. Rows 1, 3, 5: Press seam allowances to the left. Rows 2, 4, 6: Press seam allowances to the right.
- Join rows for completed top. Press seam allowances as desired.
- Layer lining face down, batting, top face up, and pin baste.
- Quilt in the ditch around the medallion.
- Quilt remainder of medallion and background as desired. Sample has straight-line quilting in the medallion, parallel to the edges of it, about 1/2" away using the walking foot as a guide. Sample has a small meander (large stipple) quilted in the background.
- Square up and trim top. After quilting it may measure slightly less than 24-1/2inches square. Note the actual measurement. (Sample measured 24".)

Quilted front
Pillow Back:
- Fuse interfacing to wrong side of 24-1/2" back following manufacturer's directions for fusing. Piece interfacing if necessary.
- Trim back to same size as pillow front if necessary.
- Use 20-22" invisible zipper and instructions.

Invisible Zipper
- If you do not have an Invisible Zipper foot, use your regular zipper foot and stitch as close to the coils as possible.
- Open zipper and press coils flat as directed in the zipper instructions.

Press zipper
- Mark the right side of the pillow top 2" in from each side and mark the zipper to match, also right side up.

Mark pillow front and mark zipper
- Pin zipper to top, right sides together, matching markings. Roll excess top out of the way as it will be to the right of the needle. Stitch the zipper, keeping the needle as close to the coil as possible. Backtack at both ends.

Stitch zipper
- Mark the pillow back and the other side of the zipper like the front.

Mark back
- Pin the zipper to the back, right sides together, matching marks.

Pin zipper to back
- Stitch the zipper, again keeping the needle as close to the coil as possible. Backtack at both ends.
- Holding the zipper tails out of the way, pin and sew the pillow front and back together from the edges to the end of the zipper stitching to complete the seam. The seam allowance will be about 1/2".

Sew remainder of seams from zipper to edge
- Close the zipper. From the wrong side, press zipper seam allowances open. The right side will now look like this:

Hidden zipper, open above zipper pull, closed below.
Finishing:
- Pin pillow back to pillow front, right sides together, zipper fully open. Sew, taking 1/2" seam allowances (approximately the same seam allowances as attaching the zipper) in order to keep the pillow square and symmetrical. Approaching the corners, shorten the stitch length and backtack on both sides of the corner.
- Trim corners close to the stitching.

Trimming the corners
- Turn pillow cover right side out, poking the corners out as sharp as possible.
- Insert pillow form, pushing it well into the corners.
- Zip closed (it will be a tight fit) and... DONE!

Finished pillow
Monday, September 23, 2013
Design Wall Monday 9/23/2013 and vacation pics
Nothing on my design wall today. I've been on vacation and have only been doing hand work lately. I hope to get back into the sewing room this week. First, though, gotta pay bills, take care of laundry, and bring Bax home from boarding.
One of the things we did on vacation was visit the Pensacola lighthouse. We've been to that area almost every year for 30 years, but never have visited the lighthouse before.


One of the things we did on vacation was visit the Pensacola lighthouse. We've been to that area almost every year for 30 years, but never have visited the lighthouse before.
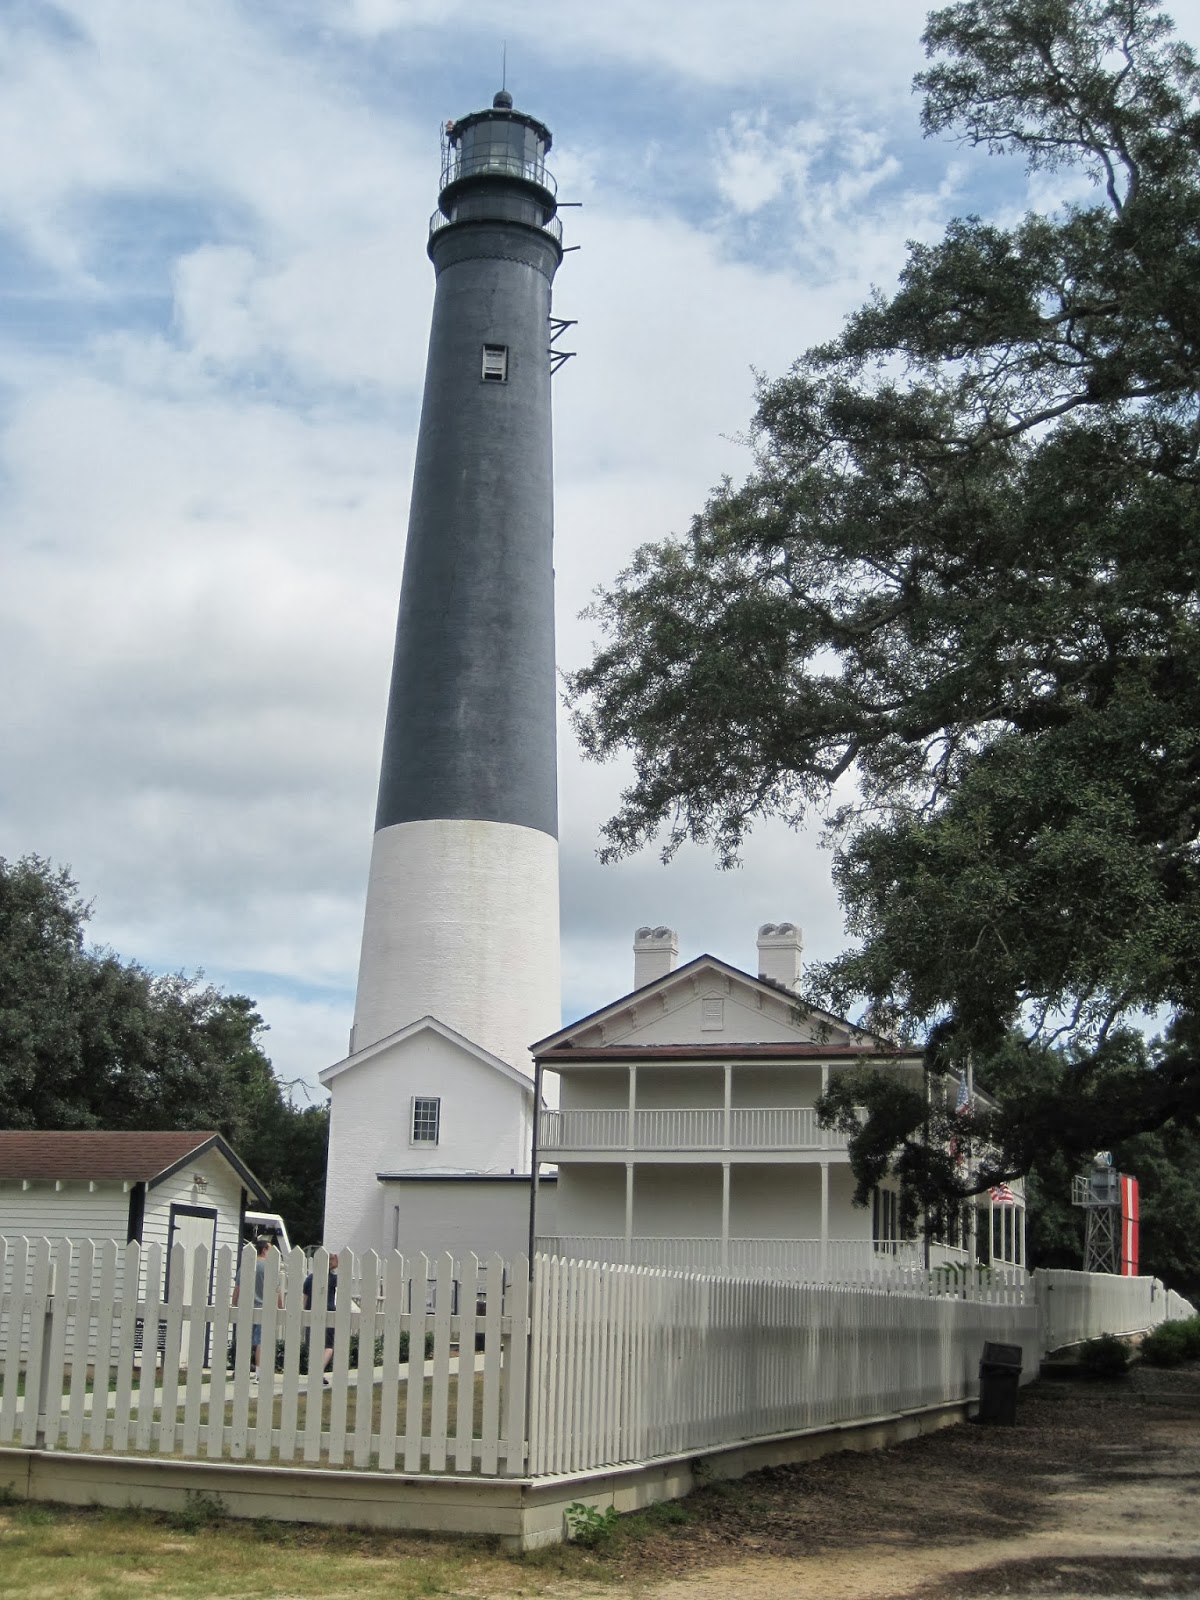
Pensacola Light
We climbed 179 stairs to the top. Going up was fine, no problem. Coming down hurt my knees and my muscles were sore for three days!

Stairs inside Pensacola Light

First order Fresnel lens
The view was spectacular from up there. From the light you can see the naval air station and the area where the Blue Angels are based. Next time we go, it will be on a Wednesday when the Blue Angels are practicing for the public (they're not, now, due to the sequester). You can also see all of Pensacola Bay and much of Gulf Islands National Seashore.

Pensacola Naval Air Station from top of lighthouse

View to southwest from lighthouse
On the grounds, we saw these shrubs with these beautiful berries. Does anyone know what they are? I've never seen anything like them before. Each berry is about 1/4-3/8" diameter. The shrubs were about 8-10 feet tall and were clustered together to make a hedge.

So even though I don't have anything on my design wall today, I'm linking up with Judy at Patchwork Times. I hope that's OK anyway!
Subscribe to:
Posts (Atom)