Monday, November 11, 2013

Design Wall Monday: A little D9P top

A few weeks ago I mentioned that I wanted to make a D9P.  I've seen them all over the web and they look like fun.

But I had tried making a D9P a few years ago, and it was a big disappointment.  I didn't have enough value contrast between the fabrics I chose, and everything just blended together in a blur.  So I ended up using the parts for something else, this one, which ended up being a baby quilt for a coworker.  I had to add the white sashing to give it some contrast. It turned out ok, and it was appreciated by the recipient who didn't know the story behind it.
Baby quilt started as D9P


So now I want to try the D9P technique again but I'll use these blocks, which have more contrast.
9-Patch blocks for D9P
 
I was able to get the top done, and here it is on my design wall:
D9P top


Cute print. The contrast is much more noticeable here.
Featured Print: Scoot by Deena Rutter for Riley Blake Designs
 
The finished size will be about 35" square. I don't have an immediate purpose for this quilt, but I'll use it to practice free-motion quilting and have it for a donation the next time I need one.
 
What a difference fabric and color choices can make!  I've been quilting a long time and still, every quilt is a learning experience for me.  Hmmm...What if I use a really dark fabric where those windmills are, and pale low volume prints everywhere else?  I may have to try another experiment in value placement.
 
Linking up today with Judy at Patchwork Times for Design Wall Monday; check out everyone's inspiring projects over there.

Sunday, November 10, 2013

Stash Report 11/10/13

Nothing added this past week - thank goodness! A couple yards used for binding and for a small D9P top. I'll calculate the totals in and out at the end of the month.

Check out everyone else's stash reports over at Patchwork Times and see how others are managing their stashes.

The book proposal is coming along on schedule so far. A friend is reviewing it this week; she'll proofread it for me so I can clean up any typos or change anything that needs to be fixed and get it sent out to AQS by Thanksgiving.  Project #1 for the proposal is at the long-armer's and is due this week. The binding is prepped and ready to add. Project #2 is finished. I still have to add the labels to both of them.

This week I think I'll work on finishing the little D9P, which I'll show tomorrow for Design Wall Monday. Also, DH's b-day is this week so I'm planning a pork roast dinner for him, his favorite. Still waiting for my kids to confirm if they can come for dinner Thursday night due to their work schedules. I sure hope so!

Friday, November 8, 2013

A small finish; QQ13 judges' comments

For Finish it up Friday over at Crazy Mom Quilts and Can I Get a Whoop Whoop over at Confessions of a Fabric Addict, I have a small finish today, a bee block for Cathy:
 

Oops, now that I look closely at the photo, I see that I missed the stitching around one of the black centers.  I'll get that fixed before I take the block to Cathy tomorrow. Not whoop whoop worthy yet!
 
 
Quilt Show Judges' Comments 
 
The Quintessential Quilt 2013 show is over and the quilts have been returned to their owners, along with the judges' comments. I like to see what the judges have to say because I can usually learn from them.  One of the quilts I entered was Charmed Snowballs; here are the judges' comments for it:
(+) = Excellent; (S) = Satisfactory; (-) = Needs improvement
Criteria Judge #1 Judge #2 Judge #3
Visual Impact S+ S S
Original in design S+ + S
Execution of chosen construction techniques + + +
Appropriateness of quilting design S S S
Execution of quilting technique + S S
Use of Color S+ + S
Balance of Design S S S
Integration of all design elements S S S
Overall Appearance S+ S S
Most pleasing aspect of this quilt is:     
Judge 1: Eclectic use of fabric  
Judge 2: Variation of colors & patterns within the repetition of design
Judge 3: Black snowball fabric well chosen, makes quilt pop
An area needing improvement is:      
Judge 1: A little more quilting?   
Judge 2: More quilting in white area may have added interest
Judge 3: Shadowing of darker fabric to light "snowball." TRIM when piecing
 
I'm surprised that they thought it was original in design since it's only the traditional snowball block. I appreciate the advice to trim away any show-through of a dark seam allowance behind a light fabric.
 
I'm kind of surprised that the judges wanted more quilting, especially in the white parts. The blocks are only 4-1/2". The straight line quilting forms an overall kaleidoscope pattern, which would be lost with more quilting in the white parts.
Charmed Snowballs
 
 
What do you think?
Have you ever had judges' comments from a quilt show? What was your reaction? Did you mostly agree or disagree? What did you learn? 
I'd love to hear your thoughts - please share in the comments.


Monday, November 4, 2013

Design Wall Monday & WIP Wednesday: the Piecing Group triangle project

Updated 11/6: Linking up with WIP Wednesday at Freshly Pieced. Check out all the inspiration over there!

I belong to a group that does hand piecing. I've been a member since 2000, and I really enjoy the meetings, the projects, the friendships, the camaraderie, and the desserts.

For hand piecing, we mark the seam lines on the wrong side of the fabric so we can stitch on the lines, and we stop at the seam allowances, which allows the seams to be pressed in any direction, even after an intersecting seam has been sewn. For this reason, hand piecing is great for projects involving Y-seams.

For those readers who are fond of English Paper Piecing, this is not the same. We don't use paper, and we just hand-sew our seams with straight running stitches.

In 2007 I started a project using tiny kite-shaped pieces to make triangles. I made templates for marking and for cutting.  The short seams measure 1" long and the triangle sides will finish at 4".
Here you can see the cutting template, the marking template, one marked patch, 3 patches laid out in a triangle, and one completed triangle.

My turn to hand out at Piecing Group comes around roughly every 18 months. We've already done four go-rounds on this project. The first three were for making the triangles, and the fourth was for sewing some of the triangles into rows.

This project has been on my design wall for more total time and more times than any other. My design wall is HUGE - almost floor to ceiling and 7 feet wide. That's almost the size of a queen size quilt. This quilt will end up about queen size; I don't know yet what the finished dimensions will be.  Because there are so many seams in this project, only half of the pieces could fit on the wall left to right at one time.

Last go round, we pieced the rows from the left side to the center. This time we'll continue each row from the center out to the right side.

What you can't see here is that the colors are very pale in the center of the quilt and get darker, very dark, toward the outside edges. There will be black border all around.


I'm very grateful for the help from my Piecing Group friends on this project. Without them, it wouldn't be possible.

The name of this quilt will be "How Many?"   - As in, how many fabrics? (over 200 different batiks used) How many of those tiny kite-shaped pieces? Not a clue, I'll count when it's finished. How many triangles? How many hexies? How many helpers worked on it? How many years did it take?

Someday I'll be able to show you the finished quilt. But you'll have to wait for at least one, maybe two more go-rounds of Piecing Group first!

Linking up with Judy over at Patchwork Times; check out what everyone else has on their design wall today.

Sunday, November 3, 2013

Stash Report for October 2013 and Goals update

In this month: 40.8 yards - yikes!
Out this month: 20.5 yards

In YTD: 143.3 yards
Out YTD: 115.1 yards

YTD net change: 28.2 yards added to stash

Here are some of the goodies I got in Paducah last week:

Border, accent, and background for the
blue project (already had the navy)
 
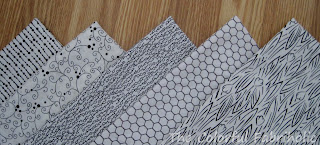
A couple more pale B&W prints - the two on the right are new.
 
Three more prints for the green project - the ones in the front are new.
 
I also got some new white-on-white crosshatch prints from the sale table. These will make good backgrounds, but they're a bit boring to show here.
 
 
Did I miss the link up for monthly goals?
 
Here's how I did on my October goals:
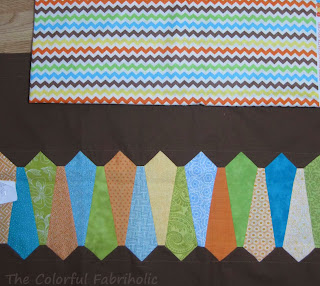
1) Complete the applique on the Dresden project.  Not done. My left thumb hurts too much for hand applique. This may have be a slower project than originally planned. I did make some progress though; I got two rows of points sewn down. 5 more rows to go. Here it is with that perfect backing print, also from Paducah last week:
 
2) Complete table runner & placemats. Done
 
3) Edit pattern for jelly roll project, named LINKED; finalize for publishing.  Done & published, here.
 
4) Reconfigure tutorial tab (Done), repost Charmed Snowballs tutorial (Done), & post hidden zipper tutorial. Done
 
5) Keep up with bee blocks.  Jayne's September blocks (handed out in October), Done.  QF First Saturday, Done . Cathy's October block, Done.  Piecing Group, Done.
 
6) Participate in pillow project sew-in if held in October.  I'm counting this as a goal met.  The sew in was scheduled for yesterday 11/2, and I participated. I also made 4 pillow covers on my own in October.
 
I also made good progress on 4 of the unpublished goals related to my book proposal. Quilt #1 is at the longarmer's for quilting, and I'm in the process of quilting #2 myself. The instructions for both are written and most of the other parts of the proposal are drafted.  I will ask for proofreading help and feedback from a couple of guild friends this week.  These two tops & backs counted in my yardage used this month.
 
November Goals:
1) Biggest goal is to get the book proposal done and sent out to AQS.
2) Keep up with bee blocks.
3) Work on the Dresden project.
4) Make 4 more pillow covers.
5) Design a project for the workshop I've been asked to give in February; I need to introduce it and promote it at a program I'm giving in January. The topic is working with Modern and/or large print fabrics, and the audience is mostly traditional quilters who are a little intimidated but intrigued by some of the modern fabrics.

This Tuesday is my turn to hand out the project at Piecing Group. Actually I traded with someone else; my project is an ongoing one which is ready to go, and she wanted more time. Also, I would have had a scheduling conflict with my original date to host. Now, I'll be able to host in December, no problem.  Come back tomorrow for Design Wall Monday to see my project. 

Linking up with Judy at Patchwork Times for Stash Report Sunday. Check out how everyone else is doing much better than I am at managing their stash!
 

Friday, November 1, 2013

Friday Finish: Table Runner & Placemats

FINALLY!!!  I'm so tired of working on these....But they're done. They'll protect the wood of the table.  I think I like the placemats better for everyday use, but the runner will be nice for when we have to open up the table for company.

And, I can count the fabric out in my October stash report.

 
Linking up with Finish It Up Friday over at Crazy Mom Quilts and Can I Get a Whoop Whoop over at Confessions of a Fabric Addict.  Check out all the lovely finishes there this week!


Wednesday, October 30, 2013

My MQU Block

As promised, here's my entry, Running Around, from Modern Quilts Unlimited magazine's block design challenge, and my tutorial for it.
Running Around
copyright July 2013 Jan Ochterbeck

12" finished block (12-1/2" unfinished) 
 
Jelly-roll and Charm friendly.
Recommended: low-volume print for center, bold print for arrows, and light neutral ground.
 
Cutting: 
-        From low-volume print or Charm cut one 4-1/2” square. 
-        From bold print cut one 2-1/2” WOF strip (or use Jelly Roll strip) then cut into four 8-1/2” rectangles. 
-        From neutral ground, cut one 2-1/2” WOF strip then cut into four 8-1/2” rectangles. From the remainder, cut eight 1-1/2” squares.
Assembly: Use scant ¼” seams.
1.      Mark the small background squares on the diagonal on the back side.
2.      Position a square on the print, right sides together; sew on the marked line.
 
3.      Press point open, then trim away excess from seam allowance. Pressing before trimming assures less distortion.  Repeat for all four arrows.
 
4.      Attach another small square, press, and trim in the same manner to form arrow point.  Repeat for all four arrows.

5.      Join background strips to upper edges of arrows.

6.      Partially join one arrow unit to center square, stopping about an inch away from the edge.

7.      Working counter-clockwise, sew remaining arrow units to center unit. Then complete the partial seam for finished block.

Here are some suggested layouts:
40" by 40"
Yardage, per EQ7:
Pale background, 1 yard
Text print, 1/4 yard
Featured Print, 5/8 yard
 
 
72" by 84"
Yardage, per EQ7:
Pale ground, 5 yards
Text print, 3/8 yard
Featured prints, 1/4 yard each (5 prints shown)
 
I hope you enjoy it! If you have any questions, please ask in the comments.  If you make my block or use it in a project, I'd love to see it!
 
 
Linking up with WIP Wednesday over at Freshly Pieced - check out all the inspiring projects over there!