Friday, February 4, 2022

Friday Finish: Sock Monkey Plus

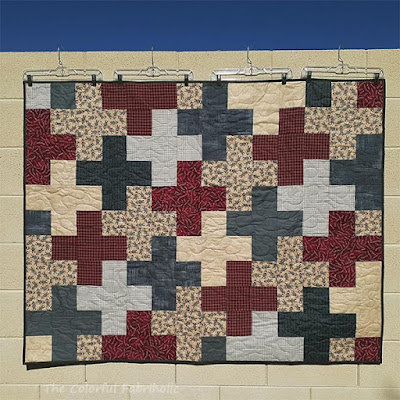
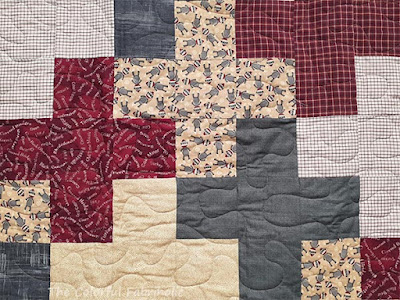
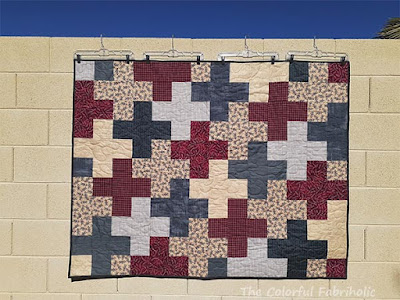
I finally had a chance to long arm quilt the Sock Monkey Plus top that I made before the end of last year. With help from an experienced PCQ member, I was able to FMQ it from the front of the machine. Just a gentle meander, but for a first time attempt I wanted to keep it simple. I enjoyed FMQing from the front of the machine much more than following a panto from the back of the machine, and it went much faster than I expected. 

Sorry for the too-bright photo, the sun is really strong here and deep shade photos were even worse. 

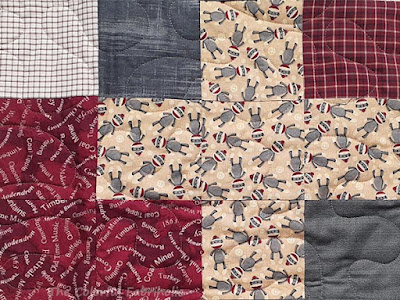
This quilt is intended as a donation quilt for a tween or teen boy. It came out about 44 x 56". Some of the fabrics are repurposed shirts; the fabrics all read masculine, and who can't smile at those sock monkeys? 😊


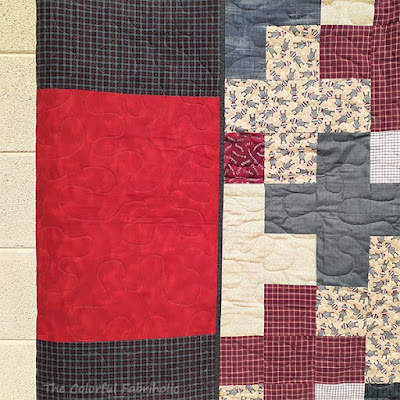
I found flannel for the back in the club's stash and pieced the backing. Combined with the not-dense quilting, this quilt is very soft, drapey, and cozy. 

I just need to finish hand-sewing down the label, and this quilt will be ready to donate. It will go to the local family services agency for abused children. 

P.S.  Thanks again Libby for the sock monkey and red text fabric. You knew I'd be able to use them!


Link Ups: Alycia Quilts,  Wendy's Quilts and More, My Quilt Infatuation


Wednesday, February 2, 2022

January Stash Report and Goals Update

 Well, January certainly went off the rails as far as goals went, but it was good for the stash report. Very productive all around, actually. I had an ambitious list of goals, but then my role on PCQ's charity committee became more about planning for certain sew days, using the club's mish-mash stash, and developing and writing up patterns, so that's what I spent most of my time on this month. 

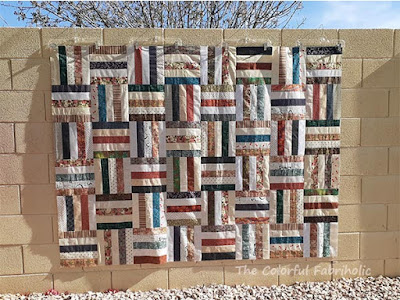
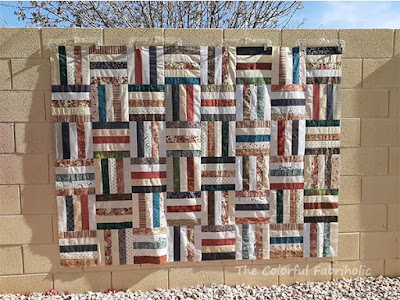
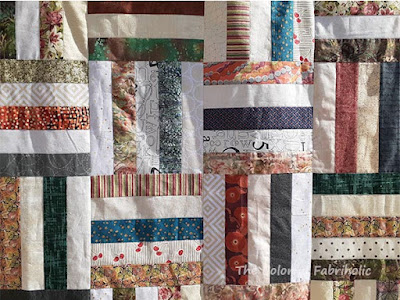
PCQ Color Bars Charity Quilt Sample Top

PCQ Charity Quilt for Kids

Let's start with the Goals update and we'll catch up with the stash report afterward. 

January Recap
1. Prep for and teach Cut and Shuffle class on 1/18. DONE

2. Assemble the coral snake blocks into a flimsy and assemble backing. No. Blocks are off the wall and have been labeled and kitted up for later assembly.

3. Assemble the blue floral strip top from Carla's box. Progress; strips are sewn together; top needs borders added. 

4. Plan and kit up donation quilts from Carla's second box. Yes, combined some of Carla's UFOs with coordinating fabrics from my stash and put them in the Intake bin in the club's sewing room. Kept a kit for my own future use, too.

5. Quilt something on the club's long arm. Yes, quilted the Sock Monkey Plus donation quilt. Learned freehand meandering from the front of the machine.

6. Participate in the No Shame Train and finish a UFO. No; priorities for the month changed and I worked on patterns for PCQ's charity quilts instead. No UFOs were touched.

7. Plan a new long term complicated and challenging project to work on over time. No, did not get to this.

Other accomplishments this month: 

1. Wrote up instructions for Fidget Mats for PCQ's website and made samples. 

2. Developed 4 simple quilt ideas suitable for use with PCQ's stash, made test blocks, and wrote up all four of the patterns. 

3. Completely pieced two of the patterns for teaching samples: Color Bars and the Quilt for Kids. 

4. Began making blocks for the third sample top, Strippy Basket Weave.


Quilted on the long arm, by me

February Goals: Since I didn't manage to get to several of my January goals, they'll have to be bumped to February. However, due to PCQ the charity committee's project schedule, I need to get the quilt sample tops done first. 

1. Finish the third PCQ charity quilt teaching sample top. 

2. Make the fourth PCQ charity quilt sample top.

3. Bind and label the Sock Monkey Plus donation quilt. 

4. Finish the blue floral strip top from Carla's box. 

5. If possible, bind the Cabbage Rose Tumblers donation quilt (currently awaiting quilting).

6. Quilt something on the club's long arm. 

7. Assemble the coral snake blocks into a flimsy and make backing.

8. Participate in the No Shame Train and make progress on a UFO. 

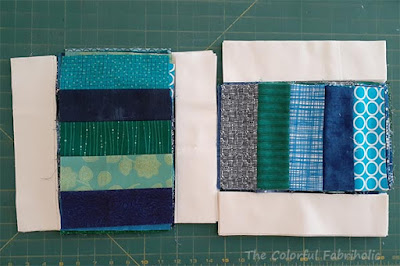
Blocks for Third PCQ Charity Quilt Sample

So, another busy month is planned for February. Since I was able to finish two samples for the charity projects using fabrics from my stash, my stash report is looking pretty good. 

Stash Report: 
January and YTD  IN: 2-1/2 yards (quilter's estate sale 2-1/2 yards)
January and YTD  OUT: 6-5/8 yards out (Fidget mat, 1/4 yard.  Test blocks, 1/2 yard.  Donated to kit, 3/8 yard  Color Bars top, about 3 yards.  Kid Quilt sample, about 2-1/2 yards.)

YTD Net Change: 4-1/8 yards OUT. It's nice to start the year moving in the right direction! My goal is to break even or reduce the stash by the end of the year. Starting with yardage out gives me a little wiggle room for shopping. 

In February I'll have more usage to count out after I get the blue basketweave top done because that's all my own stash. Then I'll figure out what to use for the fourth charity pattern sample and whether that will be all my stash or some combo of mine and the club's. 

I'll certainly be busy, with lots to do during a short month! 


Monday, January 31, 2022

The Third PCQ Charity Quilt

 Sample #3 is in the block construction process. Like the ones shown in my previous post (scroll down), it uses strips that we can die cut from the club's very random stash and kit up.  Some of the strips in the previous quilts were cut 2-1/2" by 10-1/2". Usually we can get four pieces from a WOF strip, but sometimes only three, leaving a too-short piece that I hate to waste. 

This quilt uses 2-1/2" by 6-1/2" pieces so we can take advantage of those leftover strips, or we can cut 6 pieces from a WOF strip. 


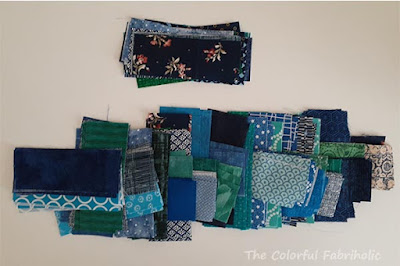
Having drafted this pattern in EQ8, I learned that it looks more pleasing in analogous color palettes or related palettes such as Patriotic or Autumnal. I chose blue, turquoise, and cool green for my palette. 

Since I depleted most of my 2-1/2" strips when I made the Color Bars quilt (post below), for this quilt I mostly cut from stash and from a few scraps. My stash skews mostly geometric with a lot of blenders, but there are a couple of floral scraps in the mix. It takes a lot of pieces to make the 48-block adult size version of this quilt. Since I wanted variety I used only one WOF strip of each print, which meant cutting manually rather than die cutting. 


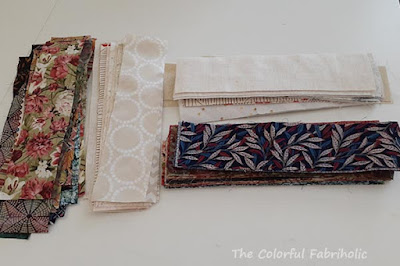
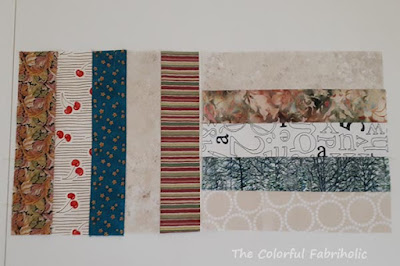
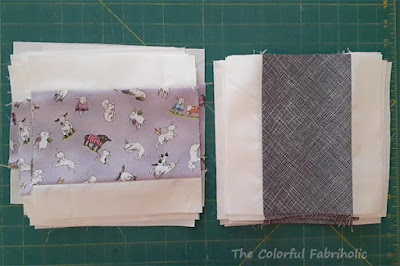
For ease of piecing, I paired up fabrics and chain pieced them in pairs. Pairs together and one more strip added, and this is how far along I am with sewing blocks. 


You can't see in the photo, but there are two different white fabrics there because I didn't have enough of either of them. One is actually a tone-on-tone, but the cast is the same creamy white as the solid so I think the two fabrics will work together. About 1/3 of the blocks will have the tone-on-tone fabric, and they'll be scattered throughout. Let's call it a design decision, okay? 

I need to finish this sample and the fourth one, still in the draft stage, by early March so the committee can plan our prep days and sew days. The focus will be: March - kid quilts; April - jelly roll quilts; and May - quilts for older boys. Looks like I'll be busy for awhile! 


Link ups: 
Small Quilts and Doll Quilts,  Love Laugh Quilt


Friday, January 28, 2022

A Change in Direction: Charity Quilt Patterns

UPDATED: If you have requested a pattern and you didn't leave your email address in your comment, I have no way of getting your pattern to you. Please be sure to include your email address within the text of your comment. 

~ ~ ~ ~ ~ ~ ~ ~ ~ ~ ~ ~ ~ ~ ~ ~ ~ ~ ~ ~ ~ ~ ~ ~ ~ ~ ~ ~ ~ ~ ~ ~ ~ ~ ~ ~ ~ ~ ~ ~ ~ ~ ~ ~ ~ ~ ~ ~ ~ ~

I had a long list of goals for this month; other than prep for and teach the Cut and Shuffle class,  everything else has changed.  

I'm a member of the Charity Committee in PCQ. Each member has a role, and mine is planning for sew days when we'll be making Kid quilts in March, 2-1/2" strip (jelly roll) quilts for adults in April, and quilts for older boys in May. So I took a careful look at the fabrics the club has available and tried to figure out what we can do with what we have. We have lots of dark and dated prints suitable for adults, lots of florals, some juvenile prints, and a few themed or novelty prints like fishing, vegetables, etc. What we don't have much of is light neutrals, and without light colors for contrast, it's almost impossible to make any pattern work. So I talked with the chair of the committee, and she ordered some flat fold cuts of light neutrals. 

Last month I presented some simple patten concepts to the committee, and I've been writing them up so we can use them for kits for sew days. Members of the committee are pattern testing, and I've made the first two samples as well. The plan is to post them on the club's website so everyone has access to them; they can download a PDF and use them as needed. 

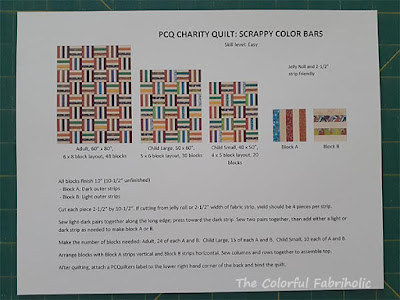
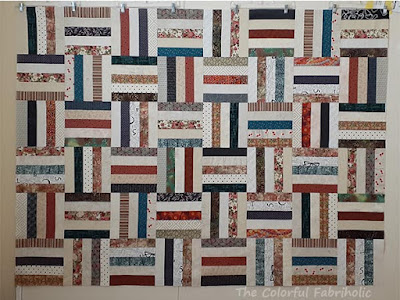
The first pattern the committee liked is simple color bars arranged in a basketweave pattern. We have such a random collection of fabrics in all sizes, so this will work well for us to die cut and kit up. It works for kids and adults. 


So I raided my 2-1/2" strip drawer, pulled a few more scraps to cut, and also used a couple of strips from Carla.

Easy chain piecing and blocks came together quickly. 

Apologies in advance for photos with bad lighting; it's hard to get good outdoor photos here, either too much sun, sun from the wrong angle, or deep shade. The wind doesn't help. Here's my color bars sample top:


This is the adult size, 60 x 80, using 2-1/2" strips and blocks that finish at 10". We ought to be able to make quite a few kits for this with the resources we have available, using a die cutter for making strips. 
Here's and indoor shot, but the colors look a bit dull.

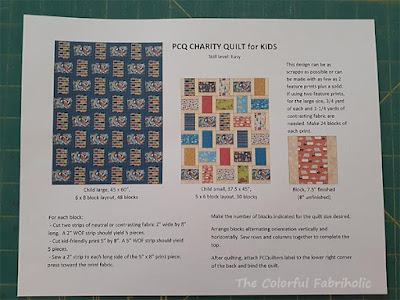
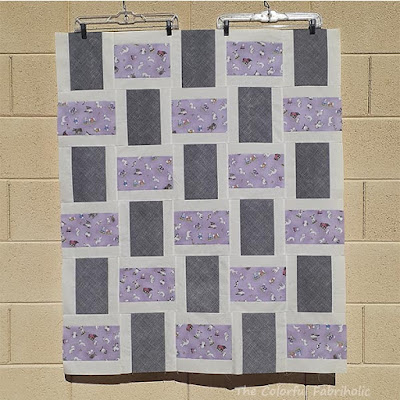
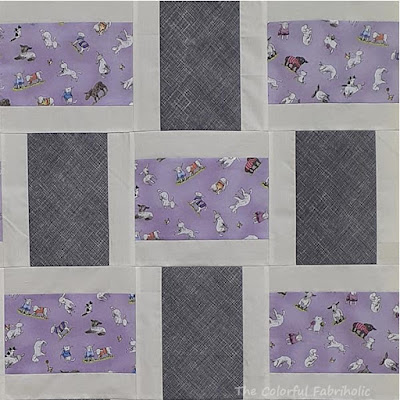
The second pattern is for kid quilts, and we'll be using this one in March to make kits. Again, a basketweave layout because it's fast and easy and results in a nice looking quilt.

This one uses strips cut at 2" wide, and we can die cut these when we make up kits. The blocks finish at 7-1/2" so we can get close to the preferred sizes of 45" x 60" (kid large) or 36" x 45" (kid small). The smaller kid quilt here will be 37-1/2" x 45", close enough. 

I made a sample of the small size using fabrics from my stash: a lilac print with sheep, a lilacy-grey Carolyn Friedlander texture, and a creamy white. 

This pattern can be made very scrappy which would be like an Eye Spy quilt, but the only kid print I had in my stash is this one. So this is the two-print version. The piecing came together very quickly. 

This will work well enough for a teaching sample when we make kits, but I think the kits we make will end up much scrappier than this. 

As we cut the large pieces (5" x 8") for this pattern from the kid prints in our stash, we can cut strips for the other patterns from leftover pieces that are too small, so we can make the best use of what we have. 

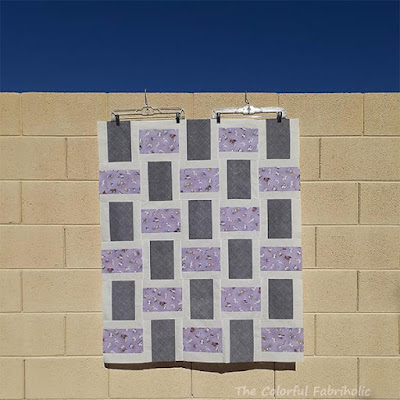
I have to close with an outdoor shot taken at about 11:30am yesterday. Look at that blue sky!!! We had a little bit of rain one night earlier this week; it must have been enough to wash all the dust and pollution out of the air. 

Anyway, back to the patterns for the charity quilts - 
A couple of the girls on the committee have been pattern testing. So far so good. The plan is to have all four patterns ready to post to the website and send them all to the webmaster at the same time so she can deal with them all at once. The other two patterns will also involve strips, because that's how we can make the best use of the variety of fabrics the club has. Stay tuned...

If you would like a PDF of either of these patterns for charitable use, leave a comment and be sure to include your email address. 


Monday, January 24, 2022

Blue Strips Progress

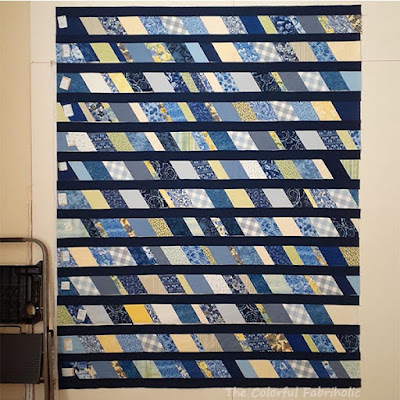
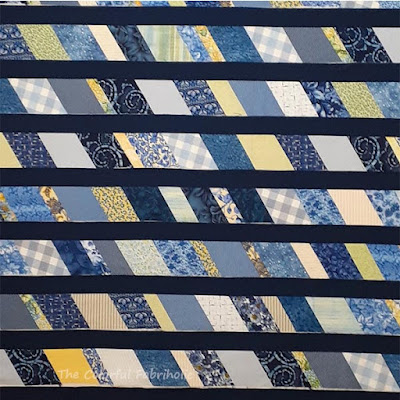
 I thought I'd be finished with this project by now, but something came up. This is where I'm at now, one navy sashing strip sewn to each pieced row, and a couple of the rows sewn together. 


As is it would be 51" by 62". I really want to add side borders to control all those seams and bias pieces. If I add side borders I need to add top and bottom borders or else the proportion will be really odd. 

Remember, these were mostly Carla's scraps, so my choices for border fabric are very limited. I have just barely enough of the batik print on dark navy ground (upper right). Boy, did it take some measuring and calculating how to cut and piece to make it work. 

I have enough for 3" wide borders on the sides and 5" borders top and bottom, to bring the quilt size up to 57" by 72". I've recently learned that the hospice we support prefers quilts for adults to be in the 60" by 80" range, so I hope this is close enough. 

My goal for social sewing on Wednesday is to get the rows sewn together and the borders added. That may be a little ambitious, so if the borders don't happen this week they can wait til next week. 


Link ups: Small Quilts and Doll Quilts,  Love Laugh Quilt

Friday, January 21, 2022

Trunk Show and Class

 At the PCQ holiday luncheon back in December I gave a trunk show to the PC Quilters. Part of it featured my book Cut and Shuffle Quilts (now out of print). Here are photos taken at the event: 

Positivity

PAussietivity (Aussie fabric)

Scoot

Heat Wave

Singing the Blues

Labyrinth

Zen Garden

The book is out of print but I had held back my last 12 copies knowing I would eventually move to Arizona. My last copies are now sold out.

As a result of the trunk show they asked me to teach a cut and shuffle class, which took place earlier this week. I had 10 students, and they all did great. I love it when students come on time and prepared! For those who didn't get a copy of the book, I had a stand alone pattern of the Positivity quilt available for them. 

We made one sample of each of the blocks in the book. We started with a framed square called the Block Mama, cut it into pieces, shuffled the parts, and reassembled them into the blocks. First we made the Plus block used in Positivity.

Cutting the Block Mama

Shuffling the Parts

The Plus Block

Simple concept, and everyone had fun with it. 

Next we made the Four Corners block, my favorite and I think most everyone else's favorite too. 

Parts for the Four Corners Block

The Four Corners Block

To assure accuracy we talked about several methods of marking either the cutting mat or the ruler with tape, and we taped down the blocks so the parts wouldn't shift while cutting. 


The third block we made was the Labyrinth block. It looks a bit wonky by itself but laid out in a quilt it works. 

Parts for the Labyrinth Block

The Labyrinth Block


We have a nice, bright sewing room with plenty of workspace, cutting stations, and ironing stations for a class of 10-12 students, but the room is much too small when a larger group is present and someone is using the long arm. We get pretty crowded at social sewing!


I think everyone had a relaxed and fun time at class, and I certainly enjoyed sharing my cut and shuffle method with these new friends. 


Monday, January 17, 2022

Design Wall Monday: Blue Strips

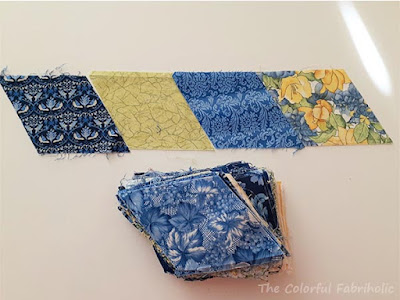
Another project inspired by Carla's first box...  Remember these pieces? They're leftovers from her Tumbling Blocks quilt. So pretty, but not enough here for a whole quilt. 

I found some prints in my stash that harmonize nicely and cut more of the same shape. The plan is to sew all the parallelogram shapes into rows. Some of the pieces were not full size, so there's variety within the rows. 

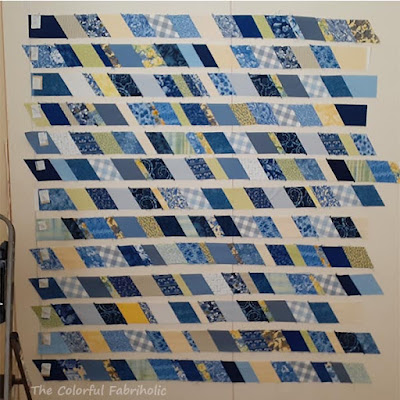
Now the rows are on my design wall: 


With a little adjustment I can get all the rows to a consistent length of 52" after the slanted ends are trimmed off, so that will be the width of the quilt. The rows will be 3" wide finished, and I'll add solid dark blue strips between them to make the quilt about 62" long. Prepping the dark blue strips and joining the rows together will be my next project for social sewing. 

A print backing for it in a harmonious shade of blue also came from Carla's donation, the one at the lower left below:


This will be another donation quilt for PCQ. A win all the way around! Carla got to destash some unwanted things; I'm designing and playing with them and have a project I can do at social sewing; the club gets another donation quilt; and eventually a recipient gets a quilt that I hope gives them a quilty hug.

Link ups: Small Quilts and Doll Quilts,  Love Laugh Quilt