Wednesday, February 27, 2019

February Recap

Wow, it's been a productive month. The wintry weather keeping me indoors, plus the fact that I wasn't distracted by a ginormous jigsaw puzzle like I was in January, allowed me to spend lots of time in the sewing room. I think I hibernated in there all month!

Although unplanned, February turned out to be a month of building new skills. I embraced string piecing from Kevin the Quilter's class and his pattern "Goodnight, Darleen!"  I'm still not sure string piecing's my thing, but it's another technique I can add to my repertoire. I also attempted and sort of succeeded at free-motion quilting spiral motifs in blocks. They're not perfect, but I'm confident enough to attempt them again.
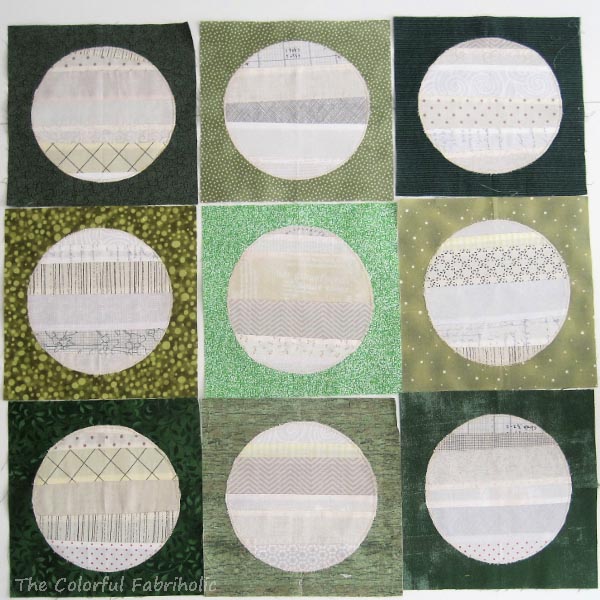
Spirals

All that sewing used up some stash, and my yardage out looks good this month. However, the LQS had another FQ sale, 5 FQs for $5 or $1.09 each, and once again I got sucked in. My guild had our annual Fabric Swap - very popular! - and I couldn't resist a few pieces of new-to-me fabric from the swap.

February Stash Report:
IN this month: 12-1/8 yards  (FQ Sale, 6-1/4 yards. CSQ Fabric Swap, 5-7/8 yards.)
OUT this month: 18 yards (1/2 yard batiks given to Jeanne;  5/8 yard moose panel given to Margaret;  5-1/4 yards for "Goodnight, Darleen!" flimsy; 1/2 yard binding for Mercyful Plus; 11-1/8 yards to CSQ Fabric Swap)

IN YTD: 21-7/8 yards
OUT YTD: 27-3/8 yards
YTD Net Change: 5.5 yards out

The goal for the year is to break even, so now I have a little wiggle room. No guilt about buying those fat quarters!

"Goodnight, Darleen!" flimsy

Goals update: 
February recap:
1. Layer, baste, quilt and bind Mercyful Plus. DONE
2. Add top and bottom checkerboard border to the Red Project. DONE
3. Prep Roman Road and send to Sandy for quilting. DONE
4. Layer, baste, quilt and bind Paddington Bear baby quilt. DONE
5. Prep for class with Quilt Diva Julie on March 1st. Yes, got my strips cut and my scraps packed. Unfortunately the class has been cancelled.
6. Continue quilting Pickle Dish. Yes, finished quilting the arcs and rings.
7. Continue string piecing "Goodnight, Darleen!" from Kevin's class. DONE - Flimsy complete! 
8. Hand stitch on WIGSP Piecing Group project.  YES! Stitched one row partially on this month. 
9. Keep up with bee blocks & BOMs. DONE
Paddington Bear baby quilt for Operation Shower

Mercyful Plus

March Goals: 
1. Make backing, layer, baste, quilt and bind "Goodnight, Darleen!"
2. Work on STLMQG challenge project, "No Excuses!"
3. Send "Mercyful Plus" to Bernie at Needle & Foot
4. Work on quilting Pickle Dish
5. Add 3rd border to Red Project, all four sides
6. Plan and start piecing a new donation quilt
7. Work on hand stitching WIGSP Piecing Group project
8. Keep up with Bee blocks and BOMs
9. Look through UFOs and select next project to work on.

STLMQG Color BOM, February Theme = Triangles

I hope March will be a productive month, too. Wish me luck!


Monday, February 25, 2019

A New-to-Me Skill

Back in January I pieced this top featuring a cute Paddington Bear print. It's been on my to-do list for quilting this month.

Because of the bias plaid, I didn't want to just give it my usual walking foot diagonal grid treatment. I'm not a proficient FMQ quilter - about all I can handle is meandering or stippling. Sometimes an actual motif is needed. This quilt needs something in the bear blocks, maybe a spiral. 

I sketched a spiral on paper and practiced stitching on the lines onto a scrap fabric, using the stitch regulator on my Bernina.  It went better than I expected. I stitched over the paper spiral three times. Then I carefully pulled the paper off the fabric to use it as a template.

The paper came off in two parts, two halves of the spiral.

I traced one of the parts onto template plastic and cut it out so I could trace around it.

Then I carefully marked around it onto the quilt, using a water-erasable marker.


Carefully, slo-o-owly, I quilted on the marked lines.

Not bad! I can do this! I quilted spirals in all the bear print blocks. (I had previously quilted in the ditch around all the blocks to stabilize the quilt sandwich.)

My spirals are not perfect, far from it. There are lots of bobbles and wobbles. But after the quilt is washed and crinkles up I think it will look all right.

Whoo-hoo! As my little grandson says, with great excitement in his voice, "I did that!"


Monday Link-ups:
Small Quilts and Doll Quilts
Em's Scrapbag
Love Laugh Quilt


PS -Thanks to all who responded to my request for weight-to-yards conversion info yesterday; some are no-reply bloggers whom I can't reply to personally.


Sunday, February 24, 2019

Stash Usage Calculation

Can any of you stash reporters help me out?

This mountain of snippets weighs 7.15 ounces. That's nearly half a pound!
Mount Snippet

I'm trying to figure out how much yardage this is. I know there's a conversion of quilting fabric weight to yardage but I can't find it. Does anyone know? Please leave a comment. Thanks! 


Linking up with Quilt Paint Create for Sunday Stash Report

Friday, February 22, 2019

"Goodnight, Darleen!" Finished Flimsy

Whoo-hoo! We finally had some good enough weather for me to take some outdoor photos. Not great weather, the wind wasn't exactly helpful, but at least not dark and rainy.

Since the top was flapping around, it took a few tries to get the whole thing in the picture. 

Finally! This shot must have happened by accident between gusts. 

Green. Maybe I can make the backing and quilt it by St. Patrick's Day. Timely!


Link ups: Confessions of a Fabric Addict, Peacock Party

Wednesday, February 20, 2019

Secret Sewing

I'm participating in a challenge project that I can't show here. 
I'll just show a sneak peek: 
A variety of low volume pieces. What will become of these? 


Monday, February 18, 2019

String Progress Continues

I've been having fun with this project ever since I took the string piecing class with Kevin the Quilter. It's a variation of his pattern "Goodnight, Darleen!" made smaller. In my last post about it, I had the center medallion of blocks assembled.

In order to measure the lengths needed for the pieced strips that make up the corners, I put the center medallion on the wall and roughly marked the size needed on the wall with strings. Then I laid the string-pieced strips up to make sure I had the right lengths, and also to make sure I didn't have the same right next to itself.

Some strips are more than long enough; a couple need to be a few inches longer so I can adjust them slightly.

Once measured, I built the corner assemblies and attached them to the center medallion. Then I put the whole thing back up on the wall to figure out the size needed for the corner triangles. I had two 7" squares of green Grunge and I was hoping they would be enough to manage all four corners. Just barely, whoo-hoo! You can see one of the squares folded in half in the corner here, and it'll be just big enough. (Because I'm making my version smaller than the pattern, the size specified in the pattern is larger than I need.)

Before attaching the corners, the whole top needs to be squared up. Using the top/bottom and side blocks of the center medallion and my largest rulers, I marked where to trim the corner assemblies. Measure and mark all four corners, make sure the diagonal for sewing on the green corner triangle measures the same on all four corners; measure the length and width of the quilt; adjust, measure and mark some more; measure again; and finally trim.

The green Grunge corner triangles were just big enough so I could add them and then square up and trim off.

Because of all the bias edges, Kevin recommended stay-stitching all the way around the outside edges of the top. After stitching I put the top back up on the wall to admire it. My version finished at about 53" square.

I auditioned a few fabrics from stash for binding. The fabric I chose is the one on the right in the photo above. For backing I have a light green print in my stash, leftovers and off-cuts from backing something else, that I can cobble together. This bias stripe will go nicely with the backing as well as the front.

If we ever get some nice enough weather to take outdoor pictures, I'll get a better photo of the flimsy. meanwhile, I'll put this away to focus on other projects for awhile. I'll quilt this one myself, but there are other projects in the to-be-quilted queue first.

Although I still don't consider string piecing my thing, it's definitely another skill and design element I can add to my arsenal. Thanks, Kevin, for gently pushing me out of my comfort zone!


Link Ups:
Small Quilts and Doll Quilts
Em's Scrapbag
Love Laugh Quilt

Friday, February 15, 2019

Merciful Plus - Finished!

Finally, after the delay caused by the jigsaw puzzle, Mercyful Plus is finished, bound and even labeled. This quilt came about thanks to the Blogger Bundle provided by Bernie at Needle and Foot

After I finally got Mercyful Plus basted, the quilting went quickly. I just gave it simple diagonal lines across the squares, using medium grey thread. 

The backing is pieced together from two text prints, a very large one and a small scale one, both from stash.

Mercyful Plus will be donated to Bernie for her hospice effort called Mercyful Quilts.
Mercyful Plus, 60 x 76" 

Linking up with Confessions of a Fabric Addict, Peacock Party, My Quilt Infatuation


Wednesday, February 13, 2019

February Color BOM for STLMQG

This year STLMQG's color BOM challenge is to pick one "spoke" of the color wheel and use only that color, neutrals, and possibly one accent color for all nine months of the challenge. Each month the challenge features a different skill or theme. This month the theme is Triangles. My color is yellow-green.

This month I played with value, ranging my yellow-greens from light to dark and my neutrals from dark to light. I'm using only black & white prints, of all densities and values, for my neutrals.

My block for this month is 12" finished; here it is with some small Economy blocks that I'll use as fillers when I put this whole top together later.

January's theme was nine patch, so my new block will join my Card Trick block and await future developments.

I wonder what next month's theme will be?

Monday, February 11, 2019

Quilting Pickle Dish

Slowly but surely it's coming along. The arcs and rings are all finished.


Now what's left is to stipple the background. This is a pretty good size quilt and wrestling it under my domestic machine is a real effort. Wish me luck!


Link ups:
Small Quilts and Doll Quilts
Em's Scrapbag
Love Laugh Quilt

Friday, February 8, 2019

Strings, Continued

I'm on a roll with Kevin the Quilter's pattern "Goodnight, Darleen!" featuring string piecing. As a reminder, here's what the pattern looks like:
Image courtesy of Kevin the Quilter

In class, we made square neutral string blocks to set at the end of each row, which are later trimmed off to form the diagonal sides of the center medallion. I didn't want to end up with excess leftover triangles, so I pieced oversized squares and cut them in half before setting the blocks into rows. 

I'm liking this! Here are the rows on my design wall: 

Next up, those sparkling diagonal borders. In class, we pieced strings onto phone book pages and cut them to the width needed, then joined them into long strips. Rather than piece onto paper, I'm just chain piecing short strips. 

Twosies, foursies, etc. When I had a bunch of them, I squared them up to the correct width so I can join them together into the lengths needed. 

They required a bit of trimming to square them up. Therefore, Mount Snippet has grown.

As you can see, it's twice as tall as my project box, and about 10" in diameter. That's a lot of trimmings! 

I'm making my version of "Goodnight, Darleen!" smaller than Kevin's so I don't know the exact lengths of border strips I'll need. I'll know the longest ones when I finish sewing the rows of the center together, then I can figure out the rest from there. 

I'll be seeing Kevin again at the end of the month, and I'm hoping to have a finished flimsy to show him. If you're interested in his pattern, you can contact him via his blog, Kevin the Quilter.


Wednesday, February 6, 2019

Off the Wall

Now that the puzzle is no longer occupying the dining table, I moved the table out to layer and baste Mercyful Plus. This top has been on my design wall for weeks, waiting....

And now I can pin baste it and get it ready to quilt. I'm hoping to get it finished this month so I can send it to Bernie at Needle & Foot. It was inspired by this Blogger Bundle I won from her in November, curated by Sandra from MMM Quilts.


This is so not my usual colors, but I like it, and I hope the eventual recipient family does too.


Meanwhile, as long as the dining room floor space is available, I may baste another quilt. Or maybe a couple more, if I have enough pins. It'll be nice to have them ready to go when I'm in the mood for quilting, and not have to wait to get them layered and basted.


Monday, February 4, 2019

More String Piecing

A couple weeks ago I took a string piecing class with Kevin the Quilter. It was a lot of fun, so much so that I continue to play with strings at home. I'm making a smaller version of Kevin's pattern "Goodnight Darleen!" shown here.

First up: the centers for Economy blocks. I didn't piece them onto phone book pages like we did in class; I just strung pieces together until I had units big enough to cover a size guide.


The Economy blocks came together quickly.  Once squared up and trimmed, they showed off my variety of greens nicely. I'm making a smaller version of Kevin's pattern, so I need fewer blocks than the pattern calls for.

String piecing makes quite a mess! In addition to all the strings and strips all over my cutting table, I had a big pile of trimmings and off-cuts from squaring up my blocks.

Then it was on to circle blocks. Again, no phone book pages. I just strung pieces together. I did use starch before I cut out the circles; I rarely do, but it may have helped here. These are all raw-edge pieced, zigzagged around the edges.

More trimming after making the circles, and the pile of snippets grew larger. I set aside some of the pieces from squaring up the economy blocks to use them as narrow strings when I make the border strips.

What I like about this process is that it's not all predetermined. Usually I have an EQ rendering and I know exactly how the quilt will look, but this string piecing process has a little more mystery about it. Although I have a general idea, I don't know exactly what this quilt will end up looking like. It's very liberating.

What I don't like about this method is the waste and the mess. Many people say string piecing uses up otherwise unused bits, but since I'm not a keeper of strings, I cut strips for this project. I may have cut too many - I won't know until I get the rest of the units made - and whatever I cut but don't use will have to find a new home. The piles of strips/strings and trimmings all over my cutting table are crowding me out and driving me nuts!

I took the class and I'm continuing to pursue this project in an attempt to get me to loosen up and relax more in my quilting endeavors. While it's an interesting experiment, I can't see myself adopting string piecing as my primary method of quilt construction. I do, however, see the benefit of the depth and texture it gives to what would otherwise be a very flat looking quilt. I could see adding string pieced low volume background units to an otherwise structured design, a la Bonnie Hunter. I'll definitely keep string piecing among my arsenal of tricks, but I don't see it becoming my favorite method.

Toward the goal of loosening up, I'm taking a Dumpster Diving workshop with Quilt Diva Julie in early March, so any leftover strips from this string pieced project will go toward that. Meanwhile, I'll continue on to the setting triangles and the border strips for this project.


Monday Link Ups:
Small Quilts and Doll Quilts
Em's Scrapbag
Love Laugh Quilt