Wednesday, July 31, 2013

Goals for August 2013

Having just started blogging, this is my first actual Goals post.

Here's what I wanted to accomplish in July:
1. Finish piecing STLMQG challenge top (Finished quilt due at September meeting) Top is done.
2. Finish writing pattern for Strip Tease and piece new top to test directions.  Done and done.
3. Post one tutorial to blog.  In work; tutorial for Charmed Snowballs is partially written but awaiting photos of the quilting.
4. Keep up with monthly bee blocks. Done.

Goals for August:
1. Quilt and finish Charmed Snowballs.
2. Finish writing Charmed Snowballs tutorial and start a new Tutorials tab in the blog.
3. Quilt and finish STLMQG Ohio Star Challenge and find someone to take it to the September meeting, which I will have to miss.
4. Get my entries together for The Quintessential Quilt 2013: labels, label covers, sleeves, entry forms sent. Give entry quilts to a friend who can turn them in on the due date, since I will be away.
5. Keep up with bee blocks and new BOM I've joined at my LQS.

Linking up with Judy at Patchwork Times, such an inspiration for keeping us all on track!

Work in Progress Wednesday - 7/31/2013

A finished top:
Charmed Snowballs

Next up, layer and baste. This is my least favorite part of the whole process.  Due to arthritis, tendonitis, inflammation, and whatever other "itises" in my hands, I don't use safety pins, too painful.  So I pin-baste with straight pins. The "itises" in my knees don't love spending a couple hours crawling around on the floor, either.  But it gets the job done and I can move on to the next step. I've tried spray basting and didn't like it, so this works better for me.
Pin Basting

Ready to quilt -
I have a wonderful sewing table from Tracey's Tables that opens up to what my husband calls "Aircraft Carrier Mode" when it's fully opened.  It's huge and I love it!  I'm starting with stitch-in-the-ditch in the straight seams, then I can remove the pins and add the rest of the quilting.  With straight pins instead of safety pins for the basting, I do get pricked and scratched up a bit during the quilting, but I've figured out how to minimize that as much as possible.
Quilting

Hoping to get the quilting finished this week.

Linking up with Work in Progress Wednesday over at Freshly Pieced - check out all the creative projects over there!

Monday, July 29, 2013

Design Wall Monday 7/29/2013

I hardly set foot in the sewing room over the weekend because the weather here was too beautiful to stay inside!  Low temps, low humidity, sunshine.  Not our typical muggy, sticky July in St. Louis.  We just had to spend some time outdoors, so DH and I went out to an event in Illinois on Saturday and to St. Francis state park yesterday.

So here's where I'm at, still snowballing along....

Rows are all assembled and some are joined together, so I'll for sure be able to get this top finished this week.  I'm not planning a border.  Finished size will be about 41 x 50, nice size for a donation for kids.  Nice size for me to manage the quilting on my Bernina, too.

Charmed Snowballs
 
I'll post a tutorial later this week.  One of the reasons I started blogging is so I can share tips, techniques, patterns and experience with other quilters who may be interested.  It's so motivating, and I am so enjoying being connected with other quilters!  I truly appreciate your visits and your comments.
 
Linking up with Judy at Patchwork Times; check out the creativity at Design Wall Monday.


Sunday, July 28, 2013

A small top assembled

I belong to the "Sew Bee It" bee of STLMQG. One of the goals of this bee is to learn or try new techniques. My turn to hand out the project was in April, and I gave everyone two Drunkards Path units to piece.  Most had never done any curved piecing. The pieces were all cut out and marked for hand-piecing if anyone was so inclined.  Everyone chose to machine piece them and they all came out fine.  I finally got them assembled into this little top, 24".  It will become either a wall hanging or a cushion when complete.
Drunkards Path

Plans for this week:  Finish the top of Charmed Showballs.  I'll show progress on Design Wall Monday tomorrow. 

Stash report - The yardage for the Drunkards Path bee blocks was already counted.  So far for July, no yardage in, WHOO-HOO!!!  I think it's the first month this year I haven't acquired any new fabric! Lots of sewing this month and some yardage to count as used so I'm doing OK this month, if I can just hold out and not buy anything for a few more days. I'll tally the total ins & outs at the end of July and post actual numbers next week.  Linking up with Judy at Patchwork Times; check out how others are managing their stashes.

Wednesday, July 24, 2013

More Snowballs - Work In Progress

More snowballs in July...


I'm working on the alternate blocks, using 5" white Kona cotton squares and 2" squares of Wordplay by Michele D'Amore for Benartex.  Same process as described in my last post, except the seam allowances are pressed toward the black corners.  Again, I press before trimming.


Here are a few of them on the design wall:


 Linking up with Work In Progress Wednesday over at Freshly Pieced; check out all the creativity over there!

Monday, July 22, 2013

Snowballs in July

This is what I have on my design wall today - little snowball blocks:
 
Snowballs on Design Wall

These are made using 5" charm squares.  Want to play along?  Here's my process.

For a 40" by 49" baby quilt I used 50  5" charm squares from various exchanges, etc., as well as some squares cut from stash.

I used white Kona cotton for the corners.  Cut 200 2" squares and mark them on the diagonal.
Marked 2" square
 
Place white squares at the corners of each charm and stitch on the marked lines.  I chain-pieced all one corner, then all the next corner, etc. 
Corners stitched to charm square


Press seam allowances toward the charm:
 Seam allowances pressed, back side

Seam allowances pressed, front side

Open the pressed corners back out and trim away the excess fabric, 1/4" away from the stitching.  I found that pressing first and trimming afterward resulted in more accurate squares and minimized stretching (rather than trimming first then pressing). Yesterday's "Pretty Pile of Points" came from all the cut away corners.
Trimming the corners away

A completed block.  Make 50 and arrange them on your design wall, leaving a same-size space in between each.
"Charmed Snowball" block

Next up, the alternate squares...

Linking up with Judy at Patchwork Times for Design Wall Monday. 


Sunday, July 21, 2013

Not quite a stash report...

The pink version of Strip Tease took 4 yards total.  No yardage in so far this month.  So far so good! I'll tally up the total ins and outs at the end of July. 

Meanwhile I've started another top which I'll show tomorrow for Design Wall Monday.  Here's part of the process:
 
Pretty Pile of Points

Linking up with Judy at Patchwork Times; see how others are doing at managing their stash.

Friday, July 19, 2013

A Finish!

The pink version of Strip Tease is finished!


Linking up with Friday Finish over at Crazy Mom Quilts. 
Go see what other quilters have finished lately!


Thursday, July 18, 2013

Channel Quilting

Channel quilting is straight-line machine quilting that runs in parallel lines in only one direction, usually vertical.  I've chosen channel quilting for Strip Tease because the stitching reinforces the vertical strippy layout of this design. 


I use the edge of the walking foot for my spacing guide, roughly 1/2" apart.  On my Bernina 1090, stitch length 3 is best for straight line and stitch-in-the-ditch quilting.  Notice I've left a gap in the center of each strip. The gap is roughly the same width as the sashing strips.  I work toward the center of each strip, three rows of stitching from each side.  The gaps hide any unevenness.  I also stitch all in one direction for the entire quilt so there isn't any bias pulling that might result from going down one side and up the other.

 
This quilt will someday end up being a donation for a children's charity.  I like children's and baby quilts to be more soft than densely quilted.  The more densely quilted a quilt is, the more rigid it feels. Narrow channel quilting is good because it gives the look of closely spaced quilting, but since it runs only in the vertical direction, it results in a less rigid quilt than one quilted every 1/2 inch in both directions.  It's sturdy enough to hold the quilt sandwich together through whatever abuse and washing a child's quilt will get.  I've used channel quilting spaced 1-1/2" apart on other quilts and it holds up fine.
 
Next up, getting the binding on and stitched down.  Hopefully I can get it done today and show the finished quilt tomorrow.

Wednesday, July 17, 2013

Work in Progress Wednesday 7/17/2013

Quilting in progress. On track to get the pink version of Strip Tease finished this week.


Next project:  A variety of 5" charms and a pile of 2" squares of
 Wordplay by Michele D'Amore for Benartex.
 
What will this become? 
 
Check out other Work in Progress over at Freshly Pieced.

Monday, July 15, 2013

Design Wall Monday 7/15/2013

This is what I'm working on:

These are the strips for the pink version of Strip Tease (see blue version in Gallery tab). 
Next up: measure and mark the striped strips and join them to the floral strips.  My goal for this week is to get this finished, completely quilted and bound. 

I'm hoping this can be a teaching sample - I'd like to teach workshops; so far the possibilities I've checked into have not panned out.

The yardage used for the top/backing/binding will be counted in my July stash report at the end of the month. No yardage in yet this month - yay!

Linking up with Design Wall Monday over at Patchwork Times.  Check out what other quilters have on their design walls today!

Thursday, July 11, 2013

Black

Today I read an article here that basically says Abercrombie & Fitch doesn't sell black clothing because they are a purveyor of casual clothing and black is a formal color. The article made some interesting references to the historical use of black; check it out.

I was a fashion industry professional for 35 years.  To some degree, black is the uniform of the fashion industry, so I based my wardrobe around black. Yes, the color specialist almost always wore black!

Black may not be as popular for decorating as for apparel, and therefore is not always considered when planning a quilt color scheme to coordinate with a room environment.  In quilting, black is a wonderful ground color because it enables all other colors to pop due to the contrast.  Historically, some beautiful Amish quilts featured black.  Now, Modern and contemporary quilts can play off black equally well.

Here's my favorite quote about black, from Leatrice Eiseman, Color Expert at Pantone:
"Adding black to any color renders that color more powerful, creating an illusion of depth, weight, solidity, substance, and most often, more subtlety."

Mega Medallion top (partial view)
Commercial cotton fabrics
 
Loop in Motion, 2006, 60" x 60"
commercial cotton fabrics
hand and machine pieced, machine quilted
 
Note: if you use solid black as the background color as in Loop in Motion, I recommend black batting and a good lint roller!


Wednesday, July 10, 2013

Work in Progress 7/10/2013

Well, not actually as much progress as I would have liked.  No time spent in the sewing room at all yesterday. Other responsibilities got in the way.

Here's progress so far on the pink version of Strip Tease.  These are 4" WOF strips with 1" sashing strips attached.

Focus fabric strips with sashing
 
Bee blocks due Saturday are finished.  Since I missed the May meeting, I have the May block to return as well as the June blocks.
 
June Bee Blocks
 
May Bee Block
 
 
Linking up with other Work in Progress over at Freshly Pieced.


Monday, July 8, 2013

Design Wall Monday 7/8/2013

Only a sneak peek today...
I'm still working on my entry into the STLMQG Ohio Star Challenge and I can't reveal it until after the meeting in September.


The border is cut to finish 4" wide but visually it's too much, so it's folded to 3".  I think I like this width better. 

I did a tutorial for my other guild, CSQ, on mitered stripe borders a few years ago.  I should find that and post it....

Linking up with Judy at Patchwork Times - check out the other inspiring projects her readers have on their design walls today!

Sunday, July 7, 2013

Revised Stash Report for June

Well, it seems I underestimated the yardage used in my Mega Medallion.  I need 3 yards of 108" wide backing.  How could a top needing that large a back consume only 8-1/4 yards including the piecing?  That can't be right.  I went back into EQ7 and put in the correct triangle measurements.  Now EQ says I used 9-3/4 yards. That seems more like it.

So, here are the revised numbers for June:

In June 2013: 8.5 yards
Out June 2013: -14.1625 yards

In year to date: 80.125 yards
Out year to date: -75.130yards

Net change: 5 yards accumulated

No yardage in and very little used this week.  I'll tally up all of July's ins and outs at the end of the month and post another stash report then.

This week I plan to work on testing my Strip Tease pattern to get it ready to publish.  Here are the fabrics I plan to use. The solids will appear as stripes against a white ground.  The original blue version of Strip Tease can be seen in the Gallery tab.

Pink Version for Strip Tease
 

Fabrics shown are Divine by Rosemarie Lavin Design for Windham Fabrics and Kona Cotton in Bright Pink 1049, Carrot 400, and Mango 192.  The sashing will be white.

I found when I was making a version to write the pattern and photograph the process that diverse colors don't work as well as related colors do.  My focus fabric featured Red, Teal, and Amber dots on Ivory ground, with the same bright colors for the stripes.  It came out too jarring, not pretty, even though the colors themselves are harmonious.  So I didn't finish the top, and I'm saving the parts for teaching samples.

I think the almost-analogous colors in the pink version will work well.  I'll take new photos of my progress to illustrate the pattern.

Linking up to Stash Report over at Patchwork Times.


Wednesday, July 3, 2013

Work in progress 7/3/2013

STLMQG has issued a challenge to create a quilt featuring the Ohio Star Block, due in September.
Here are the fabrics I'm using:

Fabrics for Ohio Star Challenge
 
 
Modern enough? We'll see...
 
Progress so far: some wonky flying geese units.
 
Wonky Flying Geese
 
This is the only post I can show about this project until the big reveal at the September STLMQG meeting.  I'll show the finished quilt then. Until then, my challenge is to make this look modern.
 
 
Linking up with WIP Wednesday at Freshly Pieced.  Check out what other talented quilters are working on today!


Tuesday, July 2, 2013

Triangle tool used for Mega Medallion

This is the tool (ruler) I used to create the Mega Medallion, which you can see in my Design Wall Monday post below.


Clear-View Triangle 60

Actually I designed the Mega Medallion quilt in EQ7, but I didn't put large enough measurements in and I thought I would end up with a sofa-size throw.  Ha!  Mega Medallion ended up ginormous, queen size, hence the name.  And it required a lot more fabric.  I kept buying black & white prints by the half yard and ended up needing a lot of them! 1/2 yard yields 16 of these triangles.

Not a well planned project...

I cut triangles of several other black & white prints, and then I ended up not using them.  The contrast was too bold, they stood out from the rest of the background prints too much, and they didn't play nicely with their neighbors.  I also had some leftover triangles of the prints I did use. 

So what to do with all these large triangles?  Too much fabric to waste, probably about 2-1/2 to 3 yards, but already cut up.  And I'm so over working with triangles for now!

So I cut some of them down to half hexies.  You can see the resulting size below, but I used a regular straight ruler and just cut the triangles off at 4" wide from the bottom. 

Lower part is the size of cut half-hexies
 
 
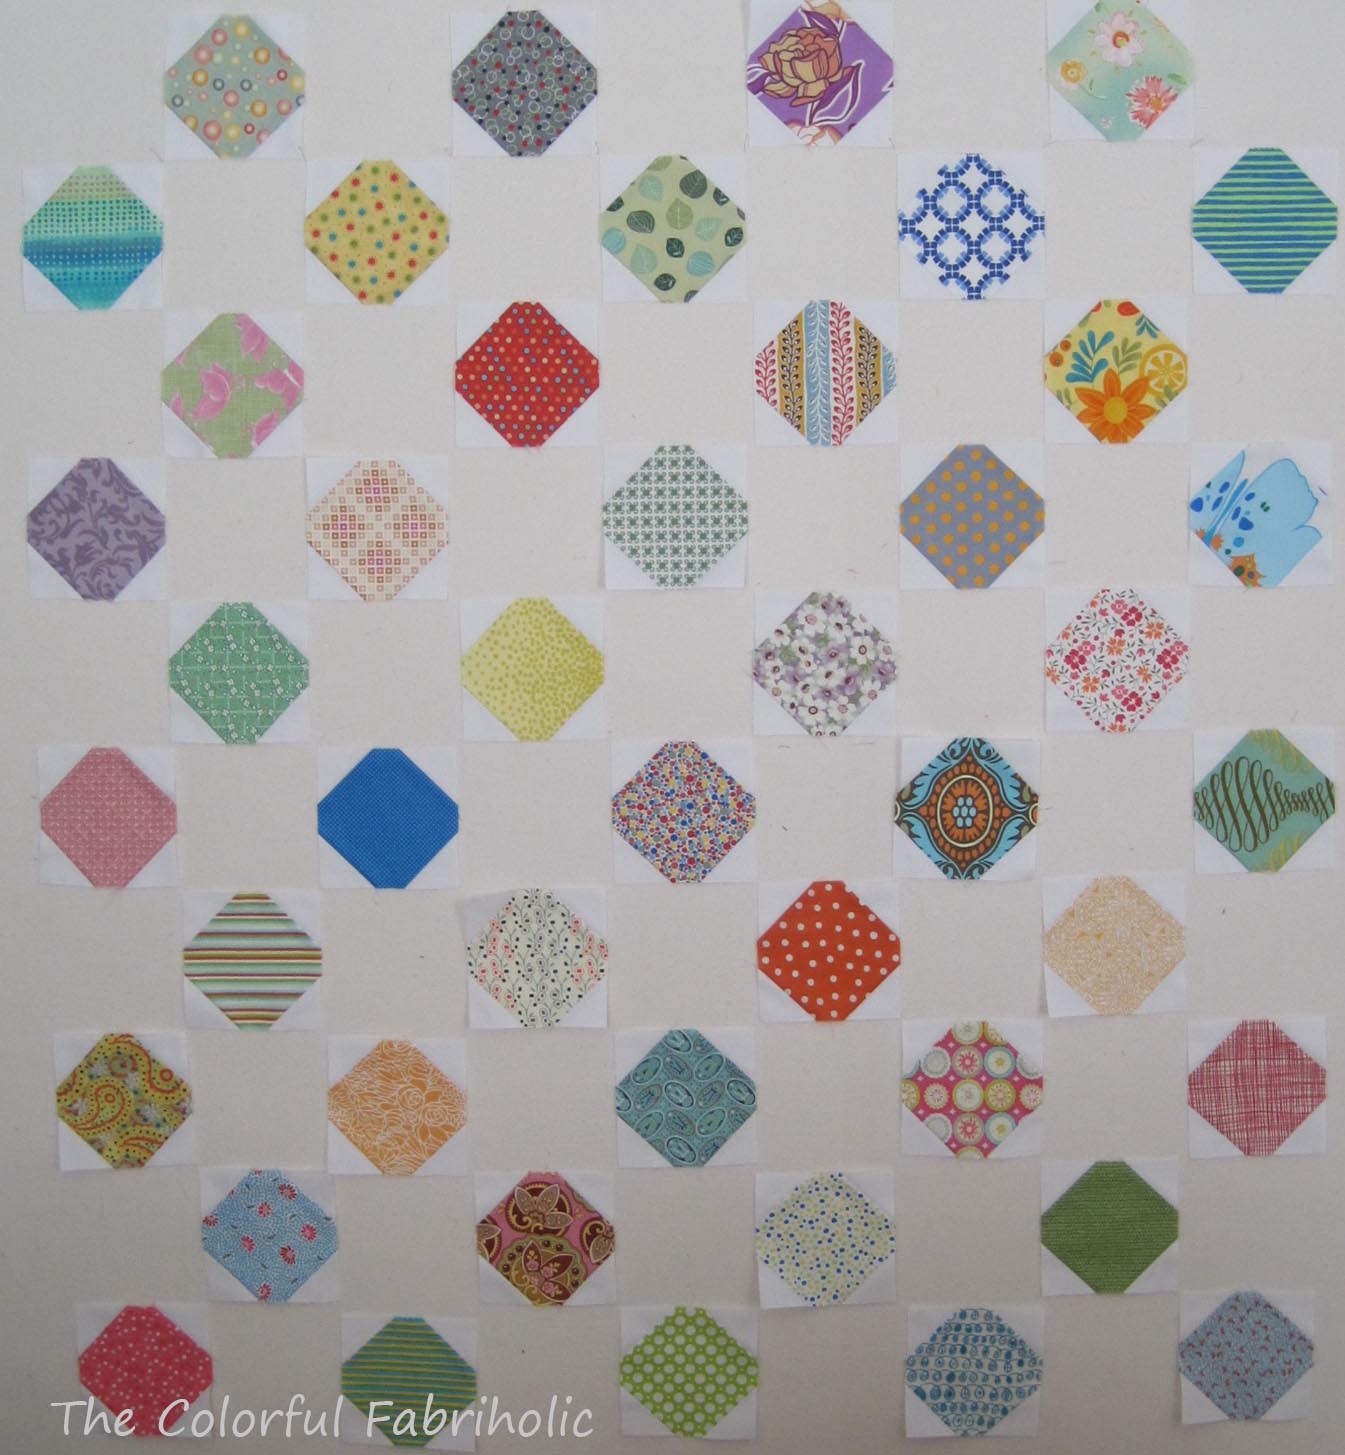
Then I added in a few colorful fabrics from stash.  This is how they all ended up, not a bad use for leftovers.  I'll probably donate it next time there's a call for donations at one of the guilds I belong to.


I used 20 more of the leftover triangles to piece the back, along with a bold black & white damask print.
 
It's machine quilted using a walking foot.  I made a plastic template in a circle and marked all the quilting.  Took about as long to mark as it did to quilt!
 
Binding the hexie shapes was surprisingly easy.  The outer points are mitered just like corners, and the inner points just pivot.  The binding is cut on the WOF, not bias, but it would probably be even easier and lay flatter if cut bias.  The binding is machine-sewn down on the back.
 
Now back to the Mega Medallion...
I'm seeing my friend the long-armer at a bee meeting tonight and I'm taking the top for Show & Tell. I'll ask her to give me an estimate for the quilting.  Mega Medallion is just waaaay too big for me to wrangle, and I don't have the skills for the kind of quilting I want.  It needs feathers, at least in the white parts.  So we'll see what the estimate is and how long her wait-list is.  This may end up in UFO status for awhile. 
 
I went back and put the correct measurements into EQ7, and it seems I underestimated the yardage used.  I'll have to correct my stash report for next time.  I'll use wide backing from my LQS; they have the same white swirly print used in the outer white ring.  I'll deal with that on the stash report when the time comes.
 
Now on to a new project...


Monday, July 1, 2013

Design Wall Monday 7/1/2013

My first "Design Wall Monday" post!

My design wall is huge, floor to ceiling and 8 feet wide.  I love it!  Today it's covered with this:

Mega Medallion
 
This is only a partial view because I can't back off enough to show the whole thing. It's a queen size medallion with borders all around of black & white prints.  All the pieces are triangles which were cut 8" tall.  It's been in work since March and I just finished the flimsy yesterday.  Really helped the stash report!
 
Linking up with Design Wall Monday at Patchwork Times - Check out what everyone else has on their design walls!
 
Jan O.