Wednesday, June 26, 2019

Coral Floral Blocks

I'm making a baby quilt similar to one of the quilts in my book Cut and Shuffle Quilts (out of print) using a pretty coral and green floral and coordinating coral and green tone-on-tone prints. When I left off last post, I had made the Block Mamas. The Block Mama is the parent block from which all the other blocks in Cut and Shuffle Quilts are made. Scroll down to Monday's post to see more.

The Block Mama gets sliced and diced: 

Then the parts are shuffled: 

Then they're sewn back together 9-patch style. This is the Four Corners block from the book. 

Some green ones, the negative version:

And the green block:

Fast and easy, and the blocks are ready to lay out on the wall so I can sew them together. 

Ugh! How can such a perky color as coral end up looking drab and dull? Part of it is the photo, taken indoors on a grey rainy day, but that's not all. The colors are blending together to create a blurry khaki mess, with insufficient value contrast and nothing to brighten it up. 

I need to rethink where I'm going with this because this isn't working. 


Linking up with Sew Fresh Quilts


Monday, June 24, 2019

I Need Some Color!

After working with only black and white for awhile, I need some color! Time to play in my stash.

Awhile ago a friend passed this floral fabric along to me. Not her taste, but she knows me well, I love it! Coral is my favorite color, and combined with olive greens, it's feminine without being overly sweet.

I found a coral tone-on-tone in my stash, and a coral stripe to use for binding. My friend also passed along some large cuts of flannel for donation quilt backings. This mottled green one harmonizes with the print.

I'm thinking of making a variation of one of the quilts in my book Cut and Shuffle Quilts, a baby quilt. My plan is to use the print for the background, coral in the four corner blocks and find another color, maybe a soft green, for the rest of the blocks.

Cut and Shuffle Quilts is out of print. The quilts in the book all start with a parent block, the Block Mama, which is a framed square. Later it will be cut up and the parts will be shuffled and rearranged to create a new pieced block.

I found a soft green in my stash that harmonizes with the coral print. Here are the Block Mamas for this project.

Now that I have a plan, I can cut up the Block Mamas, reassemble the blocks, and enjoy working with these colors.


Link ups:
Small Quilts and Doll Quilts
Em's Scrapbag
Love Laugh Quilt

Friday, June 21, 2019

Black + White: A Finished Flimsy

Whoo-hoo! I had just enough of the background fabric to make it work. 
Now it's a finished flimsy.

All things considered, it came out surprisingly flat and square at 48". 

This quilt doesn't photograph very well; it looks much better 
in person than in photos. I've found that to be true with other quilts 
that feature busy small scale prints and/or subdued colors. 

Here's the lower right: 

And the upper left:

A couple of outdoor shots:
I hate how the deck floor sticks out farther than the railing. 
It distorts how the quilt drapes, but it's my best place for quilt photos.

The back fence is better for small quilts.

A challenging pattern, and now it's done, ready for quilting.
And I'm ready for some COLOR!


Link ups: 


Monday, June 17, 2019

Lots of Partials but No Y's

Seams, that is. 

Last week I lamented the lack of enough background fabric to finish the project as originally envisioned. However, I was able - just barely - to piece together enough fabric to finish out the background at least to the points.

In the photo above, in which the blocks down the left side are sewn together, you can see a tape line where the actual side of the quilt will be. It will square up nicely and finish between 49 and 50".

Because the blocks are off-set by one-third, it's necessary to use partial seams. A partial seam to join the linking piece to a block, then sew the top edge of the block to the previous assembly, then complete the partial seam to finish sewing the side of the block to the top.

Slow going, but it's working. And best of all, no Y seams! So far I have about half of the top assembled.

Because the blocks are off-set, the center Gothic Arch shape of one block aligns with a corner wedge of the next, creating a propeller shape. Where the crossed propellers appear to overlap, I've used a fabric that creates a transparency effect.


Here's the upper left part of the quilt, so you can see the how the propellers cross and how they make paths that meander across the top.

Hopefully I'll get the rest of the top sewn together this week for a Friday finish.


Link ups:
Small Quilts and Doll Quilts
Em's Scrapbag
Love Laugh Quilt

Friday, June 14, 2019

Flying Geese

The skill for the STLMQG Color Spoke BOM for this month is Flying Geese. I love Flying Geese; they're one of my favorite design elements. I use the four-at-a-time no-waste method whenever possible. I made this Flying Geese quilt a few years ago:
Seasonal Migration, 78" x 90"

My "spoke" of the color wheel is yellow-green. I made some large - 3" x 6" - geese and some smaller ones. Here are the large ones:

With some of the large ones, I made a 12" block. I think it's called Dutchman's Puzzle.

I'll save the rest of the large geese units and use them as filler bits when I lay out the final arrangement.

The small geese are 1-1/2" by 3".

These made 6" Ohio Star blocks, which I can scatter or use as fillers in the final layout. In some of these the contrast is a little more subtle, because I'm sure there will need to be quieter places for the eye to rest in the final layout.

I'm planning for this to be a puzzle quilt a la Gypsy Wife. Have you seen the one made by Martha Bush with black and white stripes for the background? Preeti showed it here in a post about the Quilters Unlimited show (scroll down). Inspiring! I love it! I may have to try black and white stripes in my Color Spoke BOM quilt when the time comes.


Linking up with Confessions of a Fabric Addict

Wednesday, June 12, 2019

The Red Project: Moving on to Plan B

At AFS a couple weeks ago I showed the girls my Red Project top and the possible border fabrics. None of the border fabrics was really satisfactory, and in my internet searches I haven't been able to find anything suitable. Here's the EQ rendering of the original plan:

So I discussed Plan B with the girls. Plan B would extend the checkerboard border like this EQ rendering:

The response was unanimous - Plan B it is. I like it - it's not as heavy and wintry looking as the original. The finished size will still be 102" square before quilting. The part with the Dresdens fits on the top of the bed and the sides hang down long enough to cover the mattress.

Step 1 is removing the second blue border from the top. Done.

That leaves three checkerboard rows and I need seven. If I make 16-patch blocks I can sew them into border strips and add them onto the existing border. Step 2 is to figure out how many bits and pieces I have and how many more strips I'll need.

I have seven of the 11 red fabrics left, but not enough to cut as many strips as I'll need. I'll have to find a few more Civil War-ish reds to mix in. I have plenty of blues, including enough to make that final outer blue border big enough, using the strips removed from the top and adding more for length.

I'm also low on neutrals. I put my leftover neutral strips - there were quite a few because I originally cut too many - into a bag with other fabrics for a collaboration project with friends, and I'm hoping to get the strips back and use other neutrals for the collaboration project. If I need to I can find more CW neutrals to mix in.

I'll need at least 44 sixteen patches, plus a couple of extra strips to finish out the borders. 8 down, 36 to go. I'll wait til I get more reds before making more blocks so I can scatter the new prints in as much as possible.

So, the Red Project is once again moving forward. It feels good to have made a decision and gotten this project un-stalled.

This quilt still needs a name.  Or should I just put The Red Project on the label?!


Monday, June 10, 2019

The Black and White Project: Not Enough Background Fabric

I've finished sewing all the blocks for the black and white project and here they are laid out on my wall.

Although the seams between the blocks aren't sewn yet, you can see how the different values make pathways that cross. Follow the white paths, and they cross in the center. Follow the light paths, and they cross in the upper half. Follow the dark paths, and they cross in the lower half. I like to keep the darkest part of an unbalanced quilt toward the bottom because darks then to look weightier, and I don't want the layout to look top-heavy. The black path forms a ribbon around the center.

I have a big problem. As originally designed, all the areas in the photo above where the wall is showing should be background fabric. I don't have enough and I can't get more. (It's from maybe 8 or more years ago.)

The obvious solution would be to square up the top and finish it like this. It would finish at just over 40" per side, and just barely make the requirements for Curated Quilts.

I do have a little bit of the fabric left, and I'm hoping that I can use what I have plus off-cuts from some of the blocks to finish it out like this. It would go just to the white points without cutting them off.

Wish me luck!


Link ups:
Small Quilts and Doll Quilts
Em's Scrapbag
Love Laugh Quilt

Monday, June 3, 2019

The Black and White Project: Crossings

I started chasing this squirrel a couple weeks ago and it has totally taken over! I heard about the two color challenge at Color Girl Quilts, and if you use black and white as your two colors, it could be considered for an issue of Curated Quilts.

I knew immediately that I would use a pattern that features crossings, places where it looks like a pathway of one fabric intersects with another. Here's what the crossings look like:


Those aren't blocks in the photos above; they're where four blocks come together, offset by a third, with a filler patch. One actual block looks like this, a Flowering Snowball variation:

Each block is unique, very challenging, and requires attention to which fabric is placed where. My seam ripper is getting a workout! 

So far I have  about half of the blocks done. Here's what they look like on my design wall; this is roughly the bottom half of the quilt. 

The background print that reads medium grey is leftover wide backing from another quilt. Due to a cutting error, I don't have enough of it to finish this quilt as originally planned, so I'm going to have to figure out something. There may be lots of tiny pieces and seams in the outer sections of the background. Hopefully the print is so busy and choppy it'll hardly be noticeable. 


Link ups: 

Sunday, June 2, 2019

May Stash Report and Goals Update

It was a mixed month as far as accomplishments are concerned, with a major change in direction due to chasing a squirrel. Not everything got done that I had on my list, but I was pretty productive in other ways.

May Stash Report:
IN this month: 2 yards (STLMQG  - 1 yard. Potential border fabrics for the Red Project - 1 yard)
OUT this month: 5 yards 
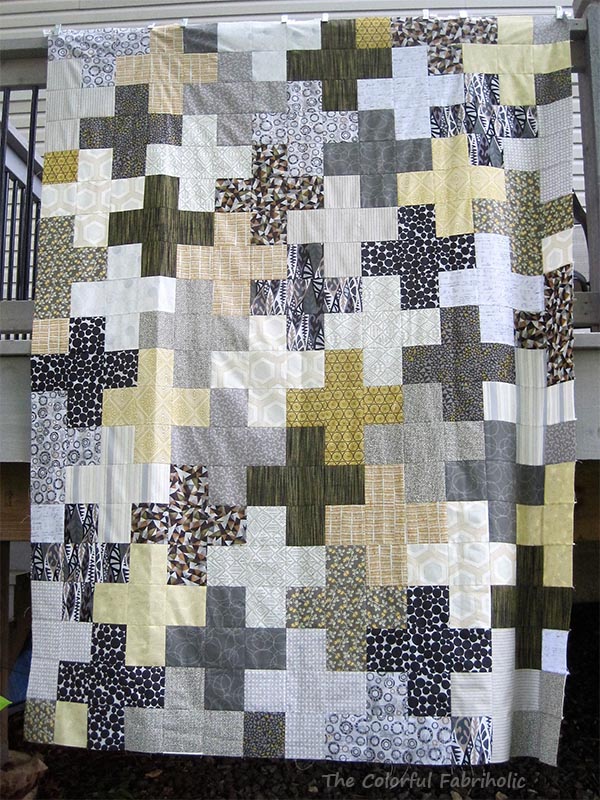
(Mineral Plus flimsy: 5 yards [20 FQs] )

IN YTD: 58-3/4 yards
OUT YTD: 50-3/4 yards
YTD Net change: 8 yards added to stash

Not bad considering all the shopping I did in Paducah, and I have plenty of time left this year to use more to break even.

Mineral Plus flimsy


Goals Update:

May recap:
1. Put hanging sleeves on the two quilts I'm entering in STLMQG's show and turn them in at the meeting on the 11th. DONE and quilts were turned in.
2. Work on the collaboration project to the point where we can get together again. Worked on it; we don't have a date yet to get together again. 
3. Mail out Hands2Help quilts. DONE
4. Finish a donation quilt, either Pup 2 or Mineral Plus. Not totally finished, but Mineral Plus is now a flimsy.
5. Decide what to do about borders for the Red Project. With input from my AFS friends, I've decided to make the outer border entirely checkerboard. 
6. Keep up with bee blocks and BOMs. Half done; one group doesn't meet this month.
7. Work on hand stitching WIGSP Piecing Group project. YES!!! I got a whole row stitched. 

Other: Jumped into the Two Color Quilt challenge at Color Girl Quilts with a black and white project.
Two Color Challenge: Black and White

June Goals:
1. Remove the blue border from the Red Project and start making additional checkerboard blocks to continue the border.
2. Finish the Two Color Challenge (black and white) project to a flimsy.
3. Quilt and bind the 2nd Pup print donation quilt.
4. Continue working on the collaboration project with friends if possible.
5. Keep up with bee blocks and BOMs.
6. Work on hand stitching WIGSP Piecing Group project.

Also, I'm giving a trunk show program to a nearby guild this week so I have to finish prepping and packing for that.

The June list looks relatively short but some of the projects on it are big or complicated and will take time.


Since I didn't post an update on the Red Project prior to June 1st Saturday, here's the update:

The project stalled because I can't find fabric I like for the outer border. One of the possible fabrics I had was too orange cast. I tried overdyeing it with a blue tint, which helped the red somewhat, but it turned all the browns and tans in the print to olive, which doesn't work at all. It's still a nice print, just not for this project.
EQ rendering of original plan

I showed the girls all the border options at AFS yesterday and also mentioned that I'm thinking of just making the outer border all checkerboard. They liked that idea best. So I played in EQ and sent them a revised rendering:
Revised with checkerboard border

The response was unanimous and enthusiastic. Also, my husband likes the checkerboards in this quilt - he thinks I should have used all checkerboard background and no white behind the Dresdens - so he'll be happy with this revision.

I'm getting used to seeing the graphic without the heavy red outer border, and I think I like the lightness of it. It doesn't look so wintery. When the quilt is on our bed, the Dresden part will cover the top, and the checkerboard borders will hang down the sides.

Now to make more checkerboard units...