
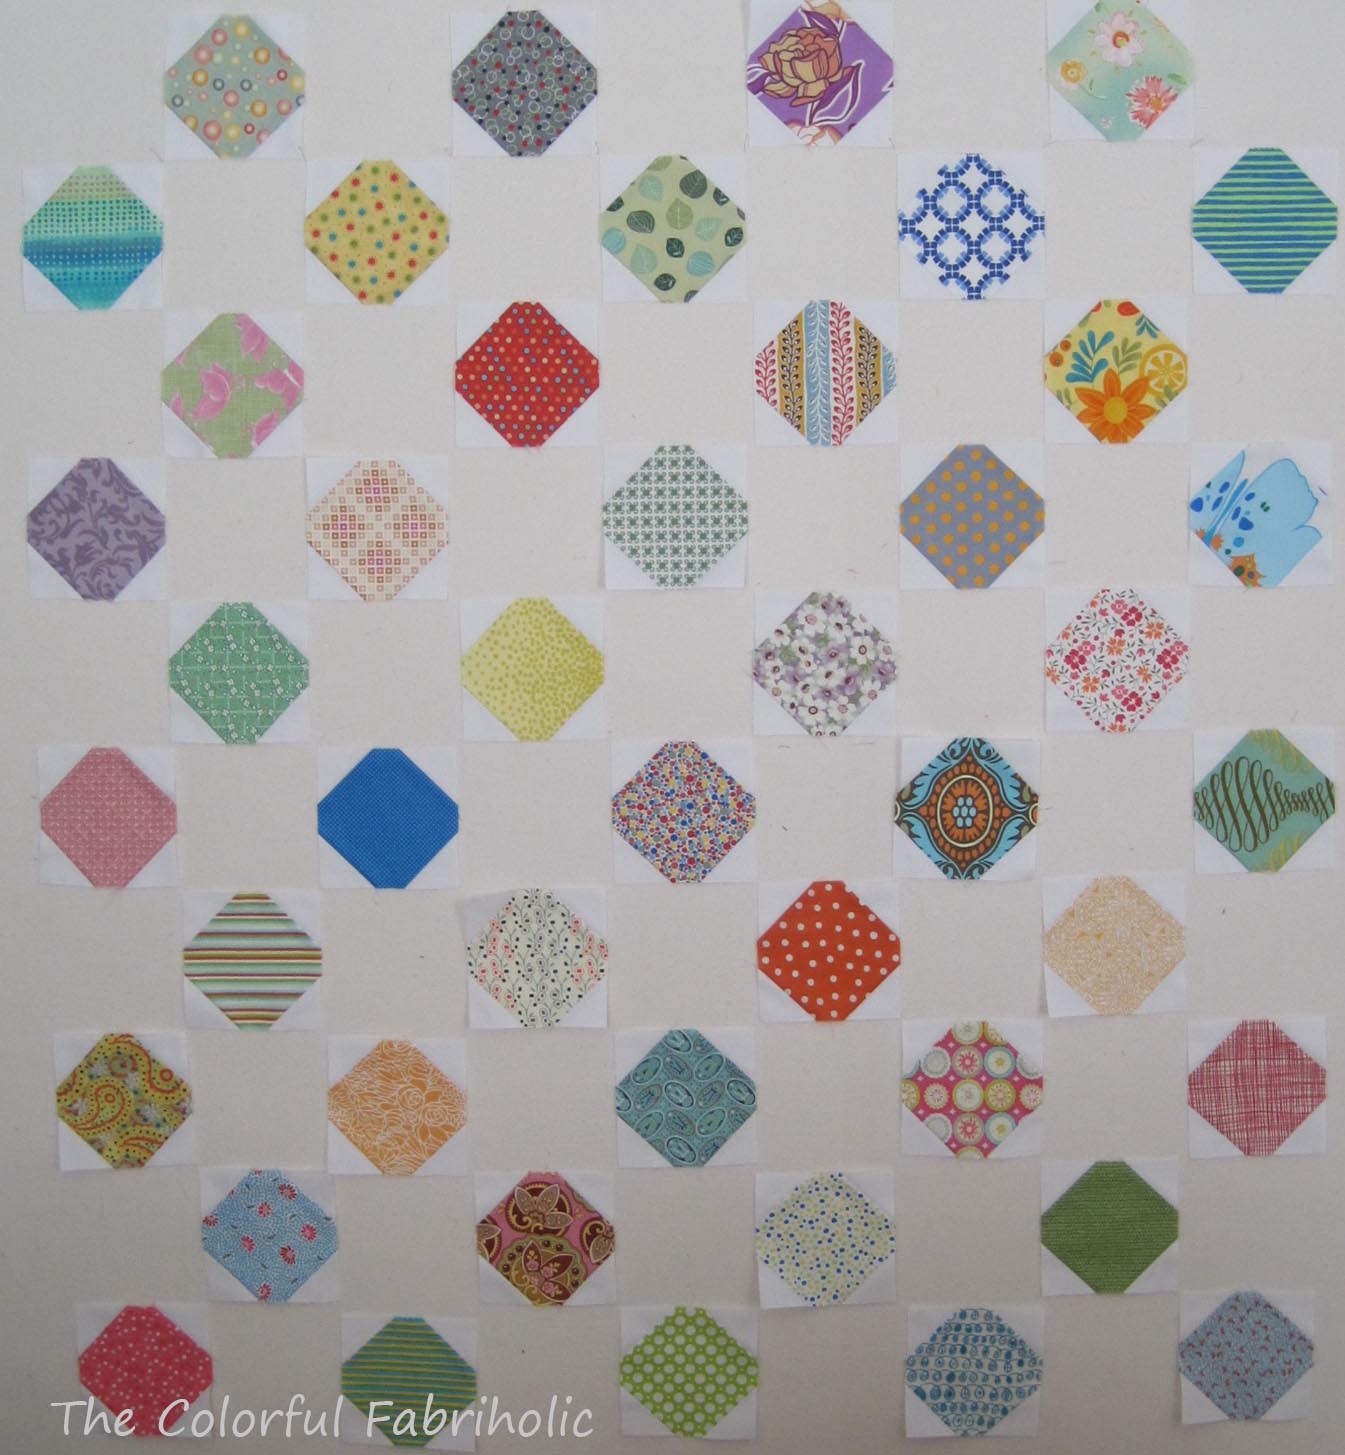
This is what I have on my design wall today - little snowball blocks:
Snowballs on Design Wall
These are made using 5" charm squares. Want to play along? Here's my process.
For a 40" by 49" baby quilt I used 50 5" charm squares from various exchanges, etc., as well as some squares cut from stash.
I used white Kona cotton for the corners. Cut 200 2" squares and mark them on the diagonal.

Marked 2" square
Place white squares at the corners of each charm and stitch on the marked lines. I chain-pieced all one corner, then all the next corner, etc.

Corners stitched to charm square
Press seam allowances toward the charm:

Seam allowances pressed, back side

Seam allowances pressed, front side
Open the pressed corners back out and trim away the excess fabric, 1/4" away from the stitching. I found that pressing first and trimming afterward resulted in more accurate squares and minimized stretching (rather than trimming first then pressing). Yesterday's "Pretty Pile of Points" came from all the cut away corners.

Trimming the corners away
A completed block. Make 50 and arrange them on your design wall, leaving a same-size space in between each.

"Charmed Snowball" block
Next up, the alternate squares...
Linking up with Judy at Patchwork Times for Design Wall Monday.
Great progress and pics, Jan! I especially enjoyed that you shared your tip for pressing first and trimming second. Clever!
ReplyDeleteLorna:)
http://sewfreshquilts.blogspot.com